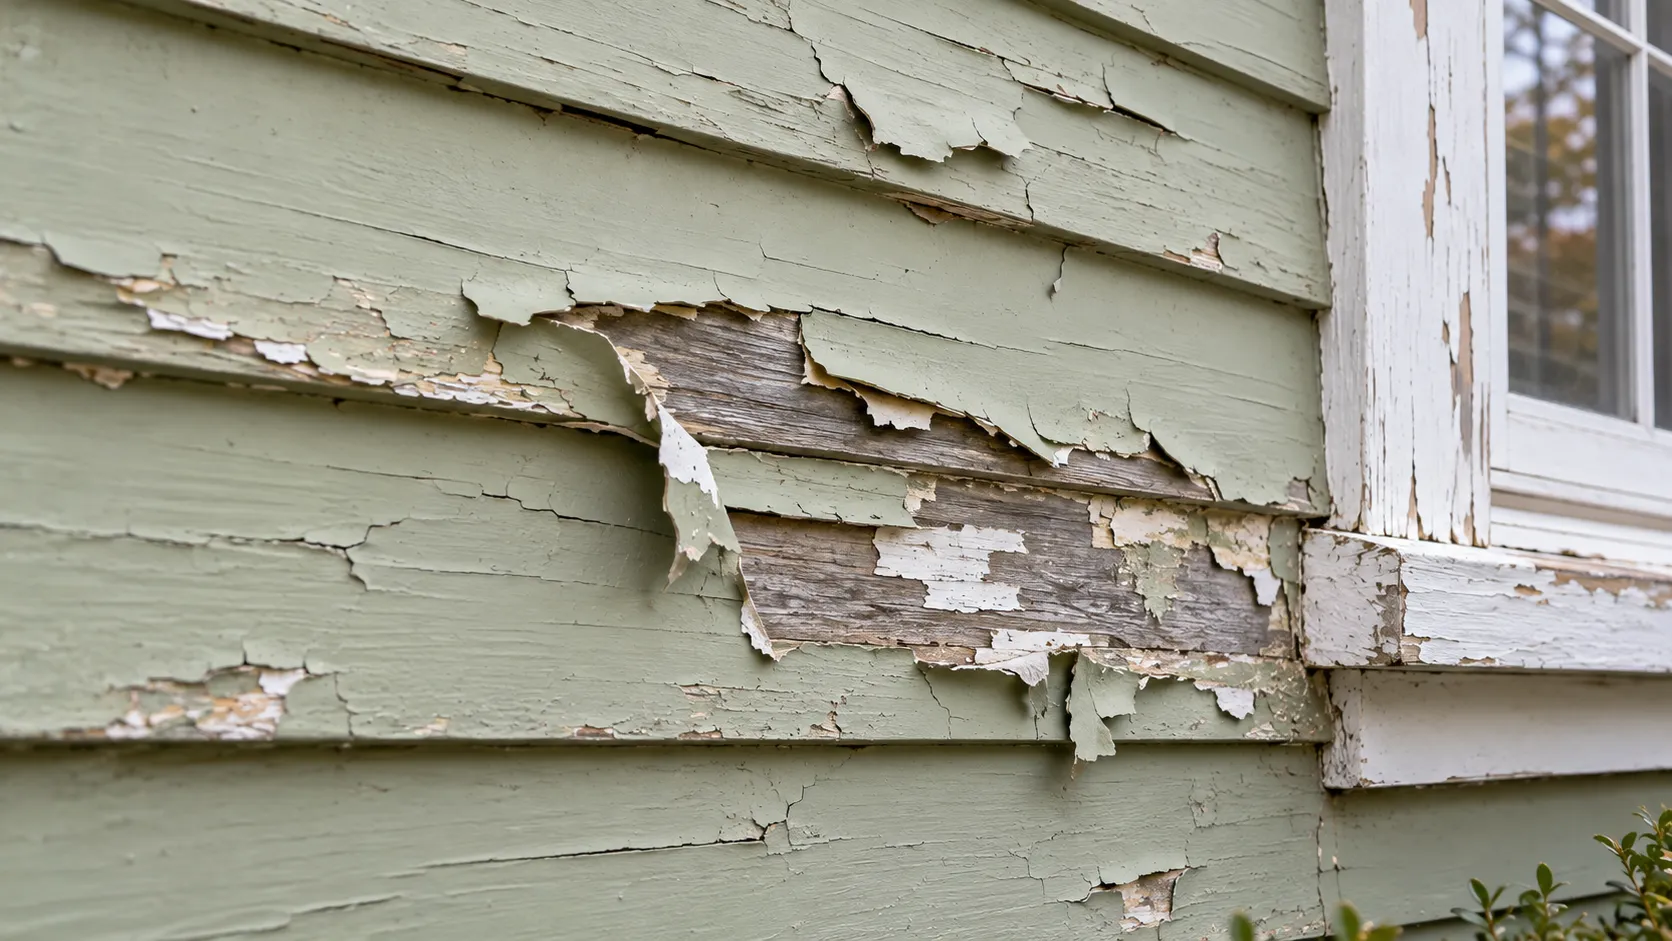
Paint peels for one of two reasons: water is getting behind it, or it never bonded properly to what was underneath. Almost every case of exterior paint peeling or paint peeling off walls inside comes back to moisture from behind (a bathroom, a leaking gutter, an ice dam, a sprinkler), a surface that was glossy, chalky or dirty when it was painted, latex put straight over old oil paint, or paint applied when it was too cold or too humid to cure. Find the cause first; new paint over an unsolved cause peels again.
We are a family-owned painting company in Morganville and have painted homes across Monmouth, Middlesex, Ocean, Mercer, Somerset and Burlington counties, plus Union, Essex, Hudson, Bergen and Passaic in North Jersey, for more than 20 years, using Benjamin Moore and Sherwin-Williams products. A large share of the houses we are called to look at have peeling somewhere, and the first question the owner asks is why. This guide walks through the peeling paint causes we actually find on New Jersey homes, how to tell them apart, and how to fix peeling paint so it stays fixed, with the technical points linked to the USDA Forest Products Laboratory, the National Park Service, Purdue Extension and the paint makers themselves.
The Short Answer: Why Is My Paint Peeling?
- Peeling down to bare wood almost always means moisture behind the paint. Look for a bathroom, kitchen, gutter, roof leak, missing flashing or wet soil nearby.
- The newest coat peeling off the old one (intercoat peeling) means the old surface was dirty, chalky or glossy when it was repainted, or the paints were incompatible, such as latex over oil.
- Bubbles or blisters are either heat blisters in the top coat or moisture blisters that go all the way to the wood. Cutting one open tells you which.
- A crackled, reptile-skin pattern (alligatoring or cross-grain cracking) means too many coats or too thick a film. It usually has to be stripped, not painted over.
- White powder on brick, stucco or block is efflorescence: salts carried out by water moving through the masonry.
- Flaking ceilings in older homes can be calcimine, an old chalky ceiling paint that new paint cannot grip without a special primer.
- The fix is always the same order: stop the water, scrape, feather-sand, spot-prime with the right primer, caulk, then repaint. On pre-1978 homes, deal with lead safely first.
Peeling Paint Causes: What Is Actually Happening
Paint is a thin plastic skin held on by adhesion. Anything that breaks that bond, from underneath or at the surface, lets it lift. The National Park Service's Preservation Brief 10, "Exterior Paint Problems on Historic Woodwork", is still one of the clearest field guides to paint failure, and its authors note that "much so-called 'paint failure' is attributable to interior or exterior moisture problems or surface preparation and application mistakes with previous coats." That sentence matches what we see: the paint itself is rarely the problem.
The Forest Products Laboratory (FPL), the U.S. Forest Service's wood research lab, publishes a two-page field sheet called "Why House Paint Fails" (Mark Knaebe, 2013). Its list of reasons reads like our inspection notes: wood that was wet when painted, siding left in the sun before priming, paint applied when it was too cold, too hot or too humid, high indoor humidity in winter, siding installed over foam board, dirty siding, and rotted wood. We cover each below, starting with the most common.
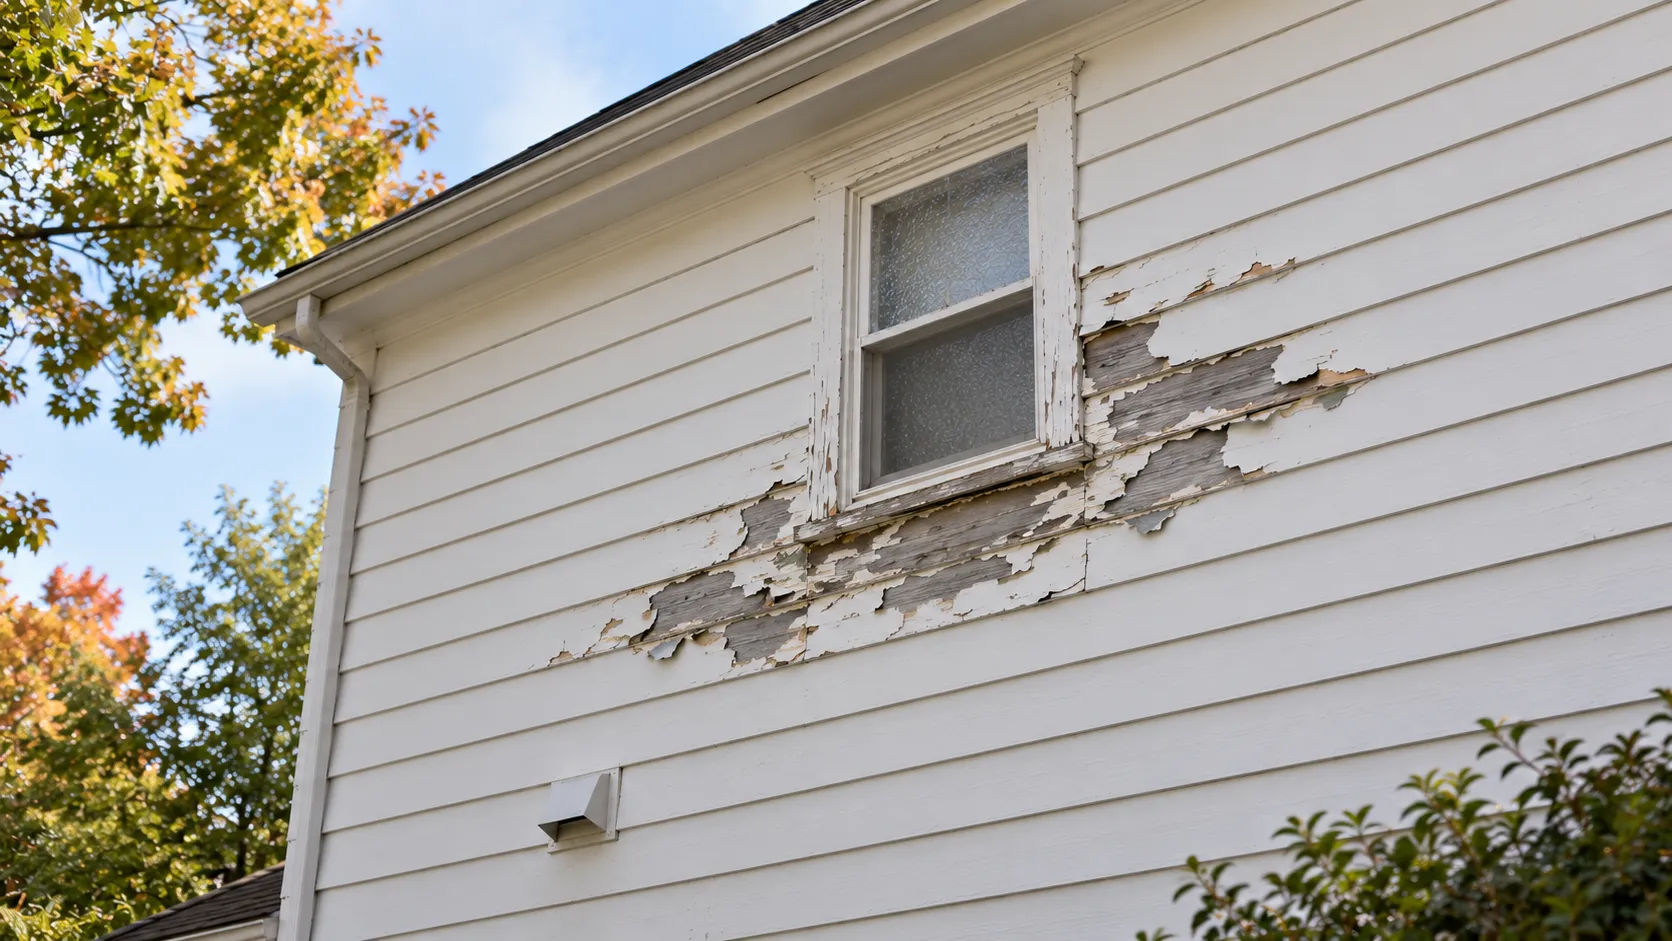
Exterior Paint Peeling: Moisture From Behind
If your exterior paint is peeling to bare wood, start with water. Preservation Brief 10 says "peeling to bare wood is most often caused by excess interior or exterior moisture that collects behind the paint film, thus impairing adhesion." It adds that peeling generally begins as blisters, and "cracking and peeling occur as moisture causes the wood to swell, breaking the adhesion of the bottom layer."
Moisture coming from inside the house
Warm, humid indoor air pushes out through the walls in winter. When it reaches the cold back of the siding it condenses, and the only way out is through the wood and the paint. The FPL sheet says high indoor humidity "is probably the cause if paint failure occurs on the outside walls of the bathroom or kitchen, and it can be even more pronounced on the outside of an upper floor." It explains the pattern with a chimney effect: warm moist air rises and "eventually this moisture travels out through the siding," and failure "may be more noticeable near electrical outlets or other breaks in the vapor barrier."
It also gives a useful clue for sorting inside from outside causes: "If failure is more pronounced outside of a lower floor, the moisture more likely comes from outdoor sources such as poor flashing." Condensation on the inside of your windows in winter, it notes, "also indicates excessive humidity in the house."
Purdue Extension's bulletin "Paint Failure Problems and Their Cure" (NCR-133), written by Daniel Cassens and William Feist, says the problem "may be particularly pronounced around bathrooms, laundry rooms, kitchens and other areas of high humidity," and lists liquid-water sources as well: "Plumbing leaks, overflow of sinks, bathtubs or shower spray and improperly sealed walls are sources of inside water."
On the colonials and split-levels we paint in Marlboro, Manalapan and Holmdel, the classic sign is a stripe of peeling clapboard directly outside an upstairs bathroom with no working exhaust fan. The fixes are indoors: an exhaust fan that vents outside and actually gets used, a lower humidifier setting, and sealing gaps around outlets. The FPL sheet also mentions interior vapor-retarding paints and outlet gaskets for houses built without an interior vapor barrier.
Water coming from outside
Preservation Brief 10 lists the exterior sources to correct before repainting: "faulty flashing; leaking gutters; defective roof shingles; cracks and holes in siding and trim; deteriorated caulking in joints and seams; and shrubbery growing too close to painted wood." It is blunt about the order of work: "There is no sense in repainting before dealing with the moisture problems because new paint will simply fail."
These are the outdoor culprits we find most often on central New Jersey homes:
- Gutters and downspouts. An overflowing or pulled-away gutter soaks the fascia and the top courses of siding every storm. Purdue notes simply that "properly maintained gutters prevent rain water splash."
- Ice dams. Snow melts off a warm roof, refreezes at the cold eave and backs water up under the shingles and into the wall. Peeling on the fascia, soffit and top of the wall that shows up after a snowy winter is a common result. Purdue says ice dams "can be reduced or eliminated by adequate insulation in attics and by proper attic ventilation."
- Lawn sprinklers. A sprinkler head that hits the same corner of the house every morning all summer is a slow version of a leaking gutter. We see it on the lower courses of siding and on garage door trim; turning the head is usually the whole fix.
- Soil, mulch and shrubs piled against the siding or pressed against the wall keep the bottom boards wet. The FPL sheet recommends a 12-inch minimum ground clearance for siding.
- Siding over foam board. The FPL sheet says water that gets behind siding installed directly over foam or foil-faced insulation board "has to travel out through the wood, pushing the paint off." Wedges under the siding, back-priming and furring strips that create an air space are the fixes it lists; that is carpentry, not painting.
One thing homeowners sometimes do that makes it worse: caulking the laps of clapboard siding. Sherwin-Williams' exterior surface preparation FAQ says "it is not a good idea to caulk the lap on your siding. To do so could trap moisture from inside the home behind the siding, causing it to come out through the paint, resulting in peeling." We caulk vertical joints, corner boards, window and door casings, and nail holes, and leave the horizontal laps open.
Poor Adhesion: When the Surface Was Wrong
If the paint is coming off in sheets but the wood underneath is dry and sound, the problem is usually the surface the last painter painted over.
Intercoat peeling: the new coat lets go of the old
When the top coat peels cleanly off an older coat of paint (you can see the old color underneath, not bare wood), that is intercoat peeling. Purdue describes it as "the separation of the new paint film from the old paint coat, indicating a weak bond between the two," and says it "usually results from inadequate cleaning of the weathered paint and usually occurs within one year of repainting."
The Park Service says it "most often occurs in protected areas such as eaves and covered porches because these surfaces do not receive a regular rinsing from rainfall, and salts from air-borne pollutants thus accumulate on the surface." Sherwin-Williams answers a contractor's question about peeling under the eaves the same way on its exterior troubleshooting FAQ: "Moisture drawn out of the house sometimes is the source of the problem, but more times than not the culprit is lack of inter-coat adhesion." Porch ceilings and soffits are where we find it most, because nobody washed them before the last repaint.
Chalky, dirty and glossy surfaces
Old exterior paint weathers to a powder called chalk. Paint applied over chalk bonds to the powder, not to the paint. The FPL sheet gives a simple test: "Old paint that wipes onto a cloth or hand (chalk) should be cleaned. If paint still wipes off, repriming is necessary. If cleaning stops chalkiness, only cleaning is necessary before top coating."
Gloss is the other adhesion killer, especially on trim, doors and kitchen and bathroom walls painted decades ago in high-gloss oil. Sherwin-Williams' interior surface preparation FAQ says that "to ensure good adhesion, glossy surfaces must first be washed clean and then sanded to allow the paint to 'grip' the surface." That applies inside and out. Our paint sheen guide explains why the glossier finishes on trim need more prep before they will take a new coat.
Latex over oil-based paint
This is the single most common cause of interior paint peeling off walls and trim that we see in older homes. Many of them had oil-based (alkyd) enamel on the trim, doors and sometimes bathroom and kitchen walls. Latex rolled straight over it looks fine for a few weeks, then scratches off with a fingernail or peels in strips when tape is pulled.
The Park Service explains why: "If latex paint is applied over old, chalking oil paint, peeling can also occur because the latex paint is unable to penetrate the chalky surface and adhere." Its photo of a peeling shutter carries the caption "A latex top coat was applied directly over old oil paint and, as a result, the latex paint was unable to adhere. If latex is being used over oil, an oil-base primer should be applied first." The reverse fails too: the same brief notes that oil over latex can peel because "the oil paint becomes harder and less elastic than the latex paint," and Benjamin Moore's paint blistering troubleshooting page lists "applying oil-based or alkyd paint over latex paint" among the causes of blistering.
Latex over oil can work. Sherwin-Williams' interior FAQ gives two routes: "wash the surface, sand and then clean the sanding dust off. You may then apply your latex paint over the oil base paint," or "wash the surface and then apply a coat of a adhesion primer and then topcoat." On trim and doors we clean, scuff-sand and use a bonding primer, because a scuff alone is easy to miss in the profiles.
How to tell latex from oil: the alcohol test
You can check what is on your walls or trim in a minute. Sherwin-Williams' exterior FAQ describes it: "wet a rag with denatured alcohol and rub the surface of the paint. If the paint softens or rubs off, it is most likely latex. An alcohol test usually will not affect an oil-base paint." Rubbing alcohol from the medicine cabinet does the same job in our experience. Clean the spot first so you are not just wiping off dirt, and test somewhere inconspicuous.
If you already have peeling chips, the same FAQ gives a second test: bend a chip between your fingers. "If it is very flexible and bends easily, it is probably latex. If it is hard, brittle and breaks instead of bending, it is most likely oil-based paint."
Painting in the Wrong Weather
Paint that went on in the wrong conditions can fail even over perfect prep. The FPL sheet says latex house paint should go on at 50°F or above and oil-based at 40°F or above, and "conditions should remain above these temperatures for 24 hours after painting." It adds that the lab does not know whether low-temperature paints "perform as well as standard paints." Some newer paints are labeled for lower temperatures; we follow the data sheet for the product in the can, and in any case plan around the overnight low and the dew, not the afternoon high.
Humidity is less obvious and just as damaging. The FPL sheet explains that when it is too humid, the water in latex paint cannot evaporate, "causing the paint to cure while still in a water-filled state. You cannot recover from this type of disaster." It also warns against painting above 90°F and painting surfaces that will soon be heated by sun. Its advice is to "follow the sun around the house," and to allow "at least 2 hours" for fresh paint to dry before dew forms.
New Jersey makes all of this harder than it looks. Rutgers' Office of the New Jersey State Climatologist notes in its climate overview that "high humidity and moderate temperatures prevail when winds flow from the south or east," that "sea breezes play a major role in the coastal climate," and that the average freeze-free season runs 163 days in the northern highlands, 179 in the central and southern interior, and 217 along the seacoast. That means humid July afternoons, heavy dew on fall evenings, and plenty of freeze-thaw cycles for any water that gets into the wood. Along the shore in Ocean and Monmouth counties, in our experience, salt and wind-driven rain wear paint faster on the ocean-facing sides of a house, so small failures there need attention sooner. Our guide to painting in cold weather in NJ gives the month-by-month numbers for the late-season window.
New Wood, Cedar and the "Mill Glaze" Question
Peeling on new cedar or pine siding and trim, often within a couple of years, is one of the more frustrating calls we get. For decades the blame went to "mill glaze," a supposed hard, shiny layer left by the planer. The FPL has looked into it. Its FinishLine "Mill Glaze: Myth or Reality?" (revised July 2013) says the lab tried to reproduce it with dull planer blades at high feed pressures and "have been unable to obtain a 'glazed' surface." When it investigated reported mill glaze failures, "in all cases, the failures were readily explained by other failure mechanisms, including raised grain, degradation of the wood surface by ultraviolet (UV) radiation prior to painting, insufficient thickness of the coating system, improper surface preparation, and moisture problems."
The sunlight point matters most. The same sheet says "exposure to UV radiation for as little as 1 week can decrease adhesion of paint to a smooth-planed surface, even though the degradation is not visible." The "Why House Paint Fails" sheet puts numbers on it: wood primed before any sun exposure did not need repainting "for at least 30 years," while duplicates left in the sun for one week before priming "required repainting at 13 years" and two weeks of sun "required repainting at 10 years."
So the practical advice for new wood is the same whether or not you believe in mill glaze: lightly sand smooth-planed wood that has sat in the sun (the FPL suggests "around 80 grit") and prime it promptly. For cedar and redwood, the mill glaze sheet recommends a primer that is "impervious to bleeding of water-soluble extractives," noting that oil-based primers block bleeding better but are more brittle. It also warns not to use a wire brush or steel wool on the wood "because iron contamination will later stain the wood."
Blistering vs Peeling, Alligatoring and Cracking
Several failures look like peeling at first glance but have different causes and fixes.
Blistering: heat or moisture?
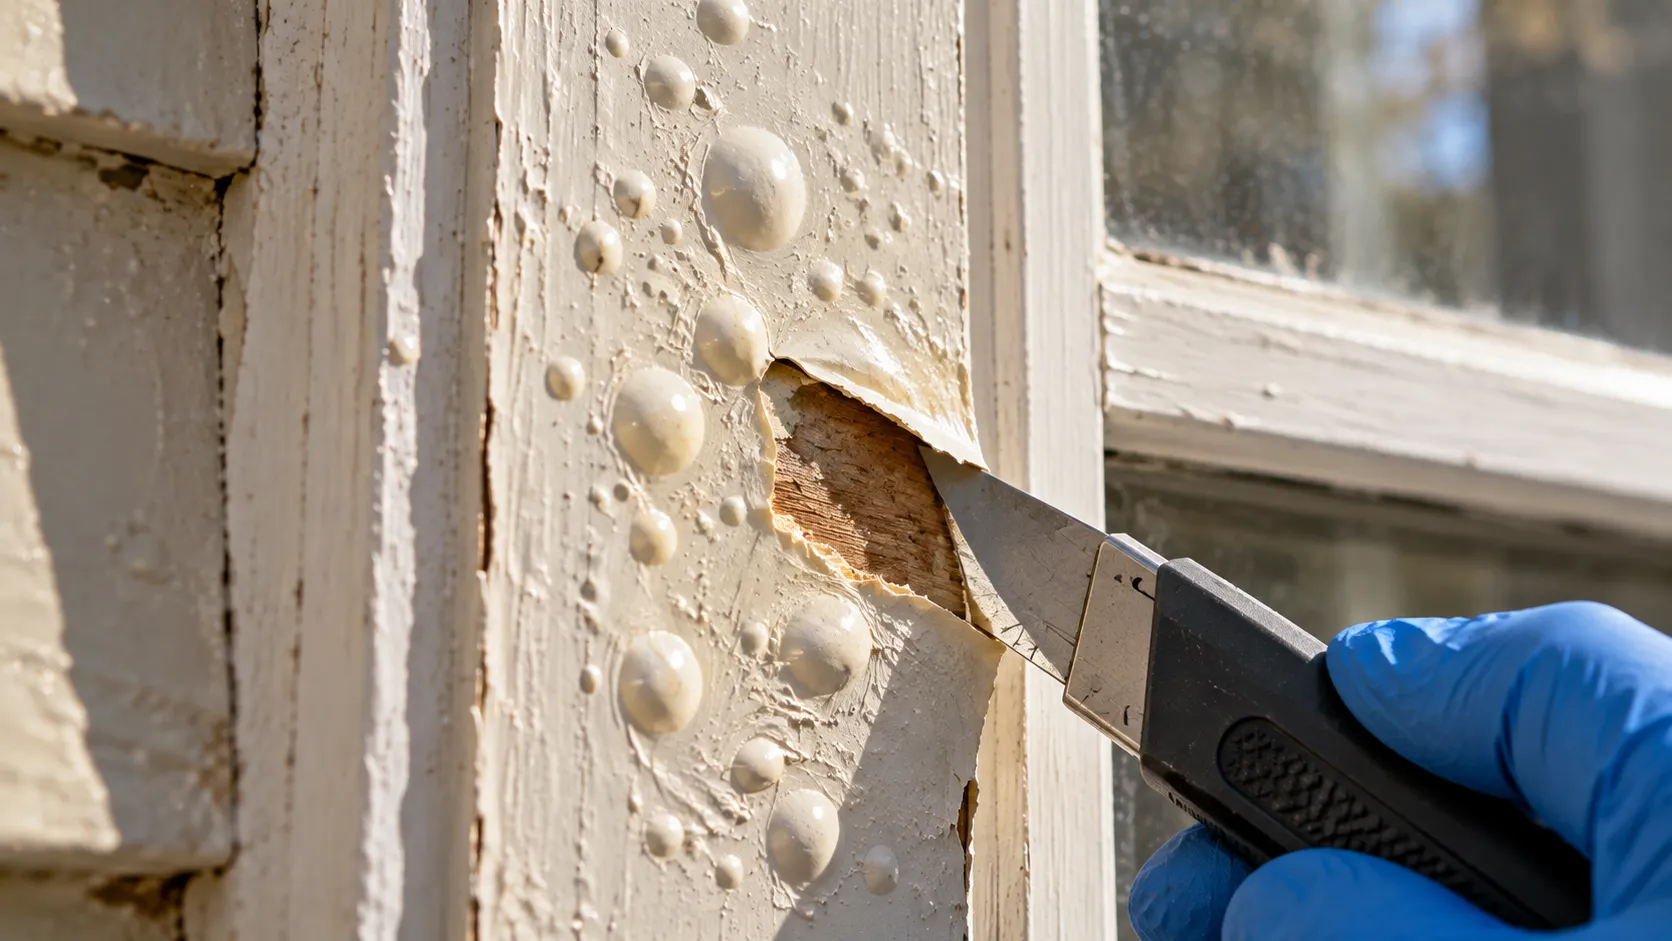
Purdue describes temperature blisters as "bubble-like swellings that occur on the surface of the paint film as early as a few hours or as long as one to two days after painting," and says "they occur only in the last coat of paint." They form when the surface skins over and trapped solvent expands in the sun; dark colors and thick coats are more prone. Moisture blisters are different: Purdue says they "usually include all paint coats down to the wood surface."
The Park Service gives the field test we use: "a blister should be cut open. If another layer of paint is visible, then solvent blistering is likely the problem whereas if bare wood is revealed, moisture is probably to blame." Heat blisters are a painting-day problem; moisture blisters mean you are at the start of the peeling described above.
Inside, blistering usually means moisture or a bad surface. Benjamin Moore's troubleshooting page lists "painting a damp, dirty, or hot surface," "excessive moisture" and "exposing latex paint to moisture shortly after paint has dried" among the causes, and recommends to "consider installing vents or exhaust fans in humid areas." A bathroom repainted and showered in the same evening is a common example.
Alligatoring and cross-grain cracking
When paint looks like reptile skin, or cracks across the grain of the siding, the film has become too thick and brittle to move with the wood. Sherwin-Williams' troubleshooting FAQ says "the most common cause of alligatoring is the application of too thick of a paint film." Purdue says "cross-grain cracking occurs when paint coatings become too thick," often on older homes painted many times, and "once cross-grain cracking has occurred the only solution is to completely remove the old paint and apply a new finishing system." The Park Service puts the danger threshold at about 1/16 inch of paint, "approximately 16-30 layers," at which "one or more extra coats of paint may be enough to trigger cracking and peeling."
Benjamin Moore's cracking and flaking troubleshooting page lists the other causes: poor surface preparation "especially when the paint is applied to bare wood without priming," low-quality paint, "spreading paint too thin during application," and paint "becoming brittle with age." Its advice is short: "Never paint over cracked paint."
Masonry, Metal and Ceilings
Efflorescence on brick, stucco and block
White, powdery deposits under peeling paint on a foundation, chimney or stucco wall are efflorescence. Sherwin-Williams explains that the deposits "are caused by moisture in the masonry. The moisture dissolves salts in the masonry" and the sun draws them to the surface. It also warns that if the high alkalinity of fresh mortar or concrete is not addressed before painting, moisture can cause "blistering, peeling and burning stains." The fix is to find the water (gutters, grading, flashing, a wet basement wall), remove the deposits, let the wall dry, and use a masonry primer. Our guides to painting a brick house and painting stucco go through those steps in detail.
Galvanized metal, aluminum and vinyl
New galvanized railings, gutters and flashing shed paint because of the factory oils on the zinc. Sherwin-Williams' exterior FAQ says that if you cannot let galvanized steel weather for six months, "it must be cleaned with a solvent to remove any surface contaminants and oils applied by the manufacturer to prevent oxidation of the zinc," then rinsed and dried. We follow with a primer rated for galvanized metal. Painted aluminum and vinyl siding have their own chalk and heat issues; see our guide to painting vinyl or aluminum siding.
Peeling ceilings and calcimine
If a ceiling in an older house is peeling in large flakes, especially after it was rolled with fresh paint, and the old paint underneath feels powdery, suspect calcimine, a chalk-and-glue ceiling paint used in older homes. Sherwin-Williams' interior FAQ says "since calcimine paints contain little or no binder, they tend to be very chalky," and recommends cleaning off as much chalk as possible, rinsing, then applying "a primer that secures adhesion on chalky surfaces" before two topcoats. Where the calcimine is heavy, we sometimes wash it off completely rather than trying to lock it down.
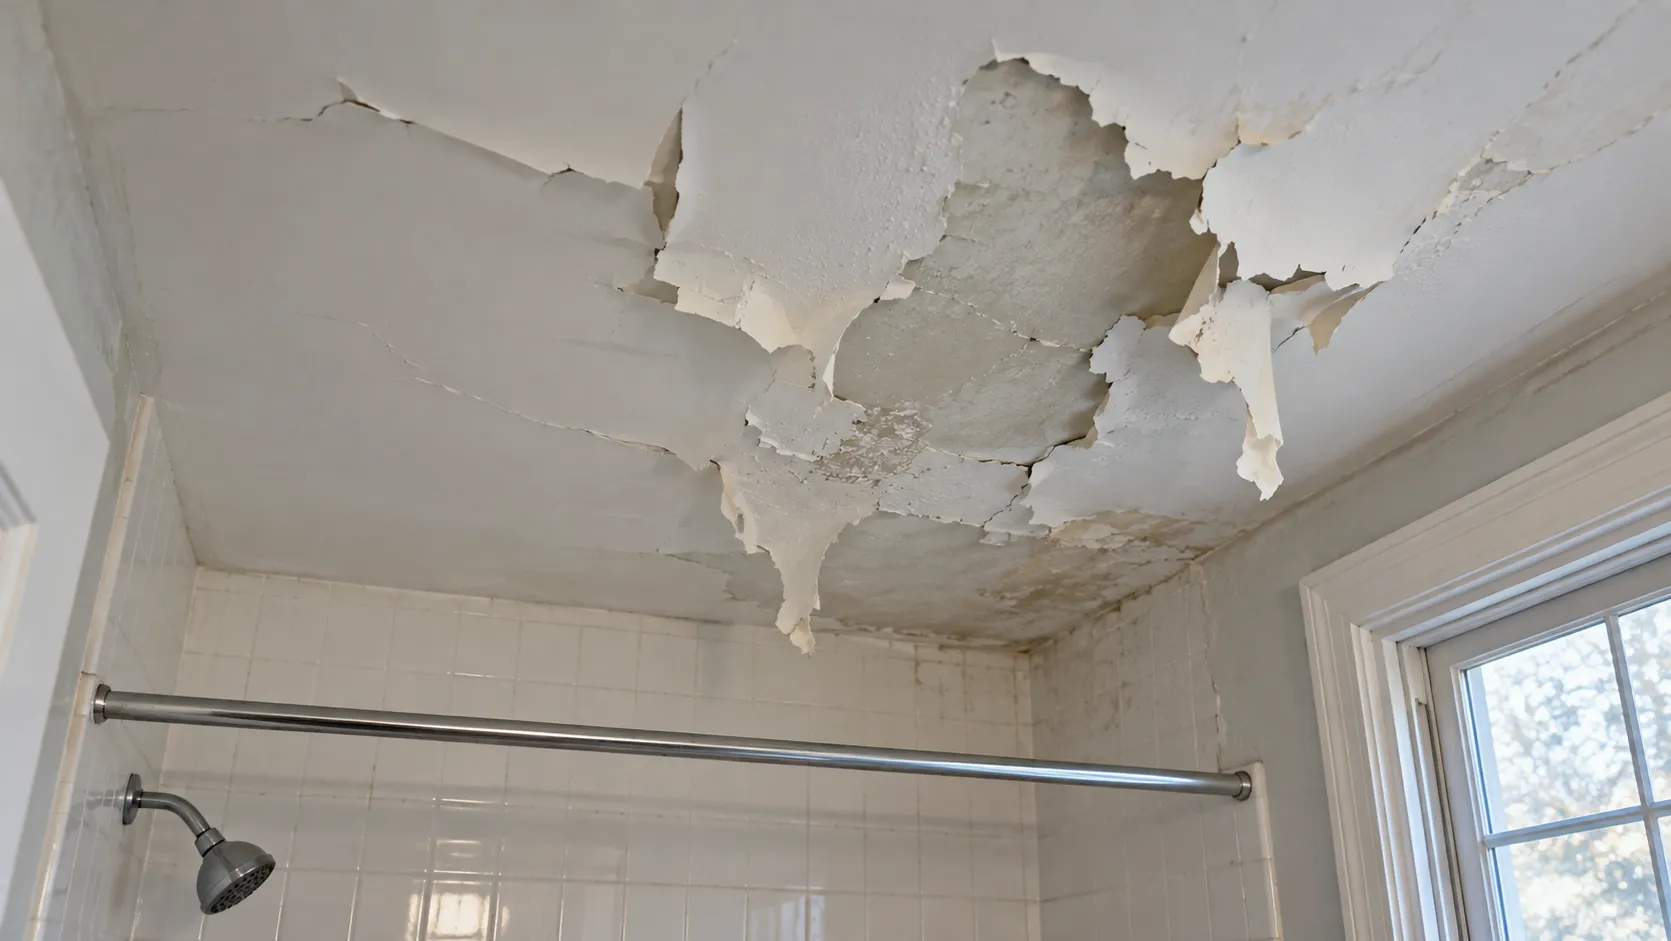
Bathroom ceilings are the other usual suspect: steam rises, condenses on the coldest surface, and eventually lifts the paint. Fix the ventilation first, then scrape, prime and repaint with a finish suited to the room.
Peeling Paint Diagnostic Table: Symptom, Cause, Fix
| What you see | Likely cause | Fix |
|---|---|---|
| Peeling to bare wood outside a bathroom, kitchen or upstairs room | Indoor humidity moving out through the wall | Exhaust fans, lower humidity, seal outlets; then scrape, prime, repaint |
| Peeling on fascia, soffit or the top of the wall after winter | Ice dams or overflowing gutters | Clear and repair gutters; attic insulation and ventilation; replace rotted wood; repaint |
| Peeling on the bottom courses of siding or garage trim | Sprinkler spray, soil or mulch contact, splash-back | Redirect sprinklers, pull back soil and shrubs, repaint |
| Top coat peeling off an older color, especially on porches and eaves | Intercoat peeling: dirt, chalk or salts left on the old paint | Scrape, wash thoroughly, scuff-sand, prime, repaint |
| Latex scratching or peeling off trim or doors in strips | Latex over glossy oil paint | Alcohol test; remove loose paint, sand, bonding or oil primer, repaint |
| Bubbles in the top coat within a day or two of painting | Temperature (solvent) blisters from heat or sun | Let cure, scrape, sand smooth, repaint in shade |
| Blisters that show bare wood when cut open | Moisture behind the paint | Find and stop the water, let the wood dry, then scrape, prime, repaint |
| Reptile-skin pattern or cracks across the grain | Paint build-up too thick and brittle | Remove paint to bare wood, prime, repaint |
| New cedar or pine peeling within a few years | Wood weathered before priming, thin coats or extractive bleed | Sand to fresh wood, stain-blocking primer, two topcoats |
| White powder under peeling paint on masonry | Efflorescence from water in the wall | Stop the water, remove salts, dry, masonry primer, repaint |
| Paint flaking off new galvanized metal | Factory oils on the zinc | Degrease, rinse, galvanized-rated primer, repaint |
| Large flakes on an old ceiling, powdery underneath | Calcimine | Wash off chalk, adhesion primer for chalky surfaces, two topcoats |
| Soft, spongy wood under the peeling | Rot | Carpentry repair or replacement before any paint |
How to Fix Peeling Paint: Our Repair Process
Before anyone scrapes, check the age of the house. If it was built before 1978, assume the old paint may contain lead until it is tested. The EPA's Renovation, Repair and Painting program requires that "anyone paid to perform work that disturbs painted surfaces in homes, childcare facilities and preschools built before 1978 be certified," and warns that old lead paint "can produce chips and dust that become a hazard when inhaled or ingested." Scraping peeling paint is exactly that kind of work. If you are doing it yourself, read the EPA's guidance at epa.gov/lead first, and see our guide to lead paint in older NJ homes for testing and lead-safe prep.
We are not an EPA Lead-Safe Certified firm, so on a pre-1978 house where the repair means scraping or sanding old paint, we will tell you at the estimate that the prep needs a certified firm. On newer houses, and on surfaces where testing shows no lead, this is our sequence on a typical peeling repair:
- Diagnose and fix the cause. Gutters, flashing, sprinklers, exhaust fans, grading. If the water source stays, so does the peeling.
- Let the wood dry. The FPL sheet says a surface-wet board usually needs one sunny day, while saturated wood needs "several sunny or windy days."
- Wash. Remove dirt, chalk and mildew so the new paint bonds to paint, not grime. If we pressure-wash, we keep the wand pointed down; the FPL warns that pointing it up "can force water behind the siding." Our power washing guide covers safe pressures by siding type.
- Scrape. Every bit of loose paint comes off with a scraper or putty knife. Purdue's instruction is simple: "First, scrape away all loose paint."
- Feather-sand. Sand the edges of the remaining sound paint smooth into the bare wood, so the old edges do not telegraph through the new coat. Purdue: "Sandpaper or 'feather' the edges of any remaining paint smooth with the bare wood." Benjamin Moore's cracking page gives the same order: scrape, "sand the area to feather the edges, prime any bare spots, and repaint the surface."
- Spot-prime bare wood promptly with the right primer for the substrate: a stain-blocking primer on cedar and redwood, a bonding primer over old gloss or oil, a galvanized-rated primer on metal, an alkali-resistant primer on masonry. Sherwin-Williams points out that primers serve jobs finish paints do not, such as "sealing a porous surface, blocking out stains, preventing rust formation on iron and steel, and preventing tannin bleed on wood."
- Caulk open joints at trim, corners and casings (not siding laps), after priming. Purdue: "Caulk large cracks and openings after treating and priming."
- Two finish coats of a quality acrylic, applied within the weather window on the data sheet.
When peeling is widespread, or the paint has alligatored or cracked across the grain, spot repair is not enough. Preservation Brief 10 says that if painted exterior wood surfaces "display continuous patterns of deep cracks or if they are extensively blistering and peeling so that bare wood is visible, then the old paint should be completely removed before repainting." That is a much bigger job, and on older homes it is also a lead-safe job.
When to call a carpenter
Push a screwdriver into the wood under the peeling paint, especially on window sills, the bottoms of door casings, corner boards and fascia. The FPL sheet says that if the wood "is soft and spongy, it is degraded to the point that it will never hold paint and should be replaced." Small pockets of rot can be dug out and filled with epoxy; larger sections need new wood. Painting over rot buys a season at most. Rot repair is carpentry and not a service we offer; we point it out at the estimate so a carpenter can replace the wood first, and then we prime and paint the new wood promptly, which is part of making it last.
What Does Fixing Peeling Paint Cost?
It depends on how much of the surface is failing and why. Our NJ painting cost guide puts exterior painting at $1.50 to $4.50 per square foot of paintable surface, and lists scraping and sanding as a separate line at $0.50 to $2.50 per square foot, with chemical or heat stripping at $0.50 to $2. On a house with heavy peeling, prep is often the largest line on the estimate. Ceilings run $1 to $2.50 per square foot in the cost guide. On pre-1978 homes, scraping by a paid contractor has to be done by an EPA-certified firm with lead-safe setup and cleanup, which adds cost, and carpentry or gutter repairs are priced separately by those trades. A spot repair on one elevation costs far less than a strip-and-repaint, which is why catching peeling early saves money.
Get a Straight Diagnosis
If your paint is peeling, we will tell you why before we tell you what it costs. NJ Painting Co. is a family-owned, licensed and fully insured painting company at 36 Church Rd, Morganville, NJ 07751, working on New Jersey homes for more than 20 years with Benjamin Moore and Sherwin-Williams products. Every estimate is free, includes an in-home color consultation, and spells out the prep, primer and number of coats; our work carries a two-year workmanship warranty. See our exterior painting and interior painting services, read how the two big brands compare in our Benjamin Moore vs Sherwin-Williams guide, check coverage on our Monmouth County and Ocean County pages, or call (732) 239-0932 and request a free estimate.
Frequently Asked Questions
Why is my paint peeling?
Usually because water is getting behind it or it never bonded to the surface. Peeling to bare wood points to moisture from a bathroom, gutter, roof, sprinkler or ice dam. A top coat peeling off an older coat points to dirty, chalky or glossy paint that was not cleaned and sanded, or latex applied over oil-based paint.
What causes exterior paint peeling on one side of the house?
Look at what is different about that side: a bathroom or kitchen behind the wall, a gutter that overflows, a sprinkler that hits it, shrubs pressed against it, or full afternoon sun. The FPL notes that peeling outside a bathroom or kitchen, especially upstairs, is usually indoor humidity, while peeling concentrated on a lower floor more often comes from outside sources such as poor flashing.
Why is paint peeling off my walls inside?
The most common causes are latex paint over old glossy oil paint, walls that were not cleaned or sanded before painting, and moisture in bathrooms and kitchens. An alcohol test on a clean spot tells you whether the old paint is latex or oil; if it is oil, it needs sanding and a bonding primer before latex will stick.
How do I tell if old paint is oil or latex?
Rub a clean spot with a rag dampened with denatured or rubbing alcohol. If the paint softens or color comes off on the rag, it is most likely latex. If nothing happens, it is most likely oil-based. A peeling chip that bends is probably latex; one that snaps is probably oil.
Can I just paint over peeling paint?
No. New paint is only as good as the layer it sticks to, so loose paint must be scraped off, the edges feather-sanded, and bare spots primed first. If the cause was moisture, fix that too, or the new coat will peel for the same reason.
What is the difference between blistering and peeling?
Blistering is paint that has lifted into bubbles but not yet broken. Blisters that show another paint layer when cut open are usually heat blisters from painting in sun; blisters that show bare wood are moisture blisters and tend to turn into peeling. Peeling is paint that has cracked and curled away from the surface.
Is it safe to scrape peeling paint on an older house?
If the house was built before 1978, the paint may contain lead, and scraping creates chips and dust that are a hazard if breathed or swallowed. Contractors paid to do the work must be EPA RRP certified. Test first, and follow lead-safe practices from epa.gov/lead if you do it yourself.
How much does it cost to fix peeling paint?
Our cost guide lists scraping and sanding at $0.50 to $2.50 per square foot and exterior painting at $1.50 to $4.50 per square foot of paintable surface. A spot repair costs far less than stripping and repainting a whole elevation, so the earlier peeling is dealt with, the cheaper the fix.
About the author
Written by the NJ Painting Co. team
NJ Painting Co. is a family-owned painting contractor based in Monmouth County, in business since 2004. We are licensed and fully insured, work with Benjamin Moore and Sherwin-Williams paints, and back our work with a 2-year workmanship warranty. We serve Monmouth, Middlesex, Ocean, Mercer, Somerset and Burlington counties, plus Union, Essex, Hudson, Bergen and Passaic in North Jersey.