Drywall repair cost depends on whether the repair is a job of its own or part of a paint job. As a standalone visit, national cost guides put a single professional repair at roughly $300 to $480 (Homewyse, September 2026), with small holes from $60 to $200 and whole-house repair lists from $450 to $2,000 (This Old House, June 2026). As part of a repaint, the picture is different: our own NJ painting cost guide prices patching and sanding at about $0.50 to $0.75 per square foot, and ordinary nail holes, dents and cracks are already included in our interior painting price. The expensive repairs are the ones with a cause behind them: a leak, a moving crack, or a ceiling that is letting go.
We are a family-owned painting company in Morganville and have painted homes across Monmouth, Middlesex, Ocean, Mercer, Somerset and Burlington counties for more than 20 years, using Benjamin Moore and Sherwin-Williams products. Wall and ceiling repair is the prep we do before the paint goes on, so we see drywall and plaster damage on almost every interior estimate. This guide covers what the common repairs cost, what causes them, how we fix them so they do not show through the paint, and which problems are not a painter's job at all. The technical points are linked to the Gypsum Association, the National Park Service, the EPA, Sherwin-Williams and Benjamin Moore, and every national price is attributed to the cost guide it came from.
The Short Answer: What Drywall Repair Costs
- One standalone repair by a professional: about $303 to $481 per repair nationally, according to Homewyse. Most of that is the trip, setup and return visits for drying time, not materials.
- Small holes, dents and nail or screw holes: $60 to $200 professionally and $10 to $30 in materials if you do it yourself, according to This Old House.
- Cracks: $60 to $330 according to This Old House. A crack that keeps coming back needs a diagnosis, not a third coat of compound.
- Ceilings: $320 to $1,300 for ceiling holes according to This Old House. Overhead work is slower and harder to hide.
- Skim coating: $0.96 to $1.36 per square foot nationally according to Homewyse, before primer and paint.
- As part of a paint job with us: routine patching is included in the painting price. Heavier wall repair is listed separately at about $0.50 to $0.75 per square foot, per our cost guide.
- Not a painter's job: active leaks, mold, sagging or soaked board, and cracks that are growing. Those go to a plumber, roofer, remediation company or structural engineer first.
Drywall Repair Cost by Type of Repair
The table below puts the national figures side by side. We have named the source of each range because the guides do not agree with each other, and because none of them is a New Jersey quote. The only New Jersey numbers in this article are the ones from our own cost guide.
| Repair | Published range | Source of the range | What moves it |
|---|---|---|---|
| Nail pops, nail and screw holes | $60 to $200 professionally; $10 to $30 DIY | This Old House, small holes (nails/screws) | How many there are and whether they are on a ceiling |
| Small holes up to about 4 inches, dents | $60 to $200; at least $75 per small hole | This Old House; Bob Vila, citing Fixr | Minimum trip charge, texture match |
| Large holes | $100 and up; about $50 to $80 per square foot of repair | This Old House | New board, backing, taping and three coats of compound |
| Cracks | $60 to $330; $303 to $481 per crack as a standalone visit | This Old House; Homewyse | Whether the crack is cosmetic or still moving |
| Several holes and cracks in one room | $200 to $550 | Bob Vila | Number of repairs done in one visit |
| Ceiling repair | $320 to $1,300 for ceiling holes; $374 to $481 per ceiling patch | This Old House; Homewyse | Height, overhead labor, texture, lighting across the ceiling |
| Water damage | No reliable single figure. Priced as a patch or ceiling repair once the leak is fixed; toxic mold remediation averages around $2,300 | This Old House (mold figure) | The leak repair, how much board got wet, mold |
| Skim coat | $0.96 to $1.36 per square foot, primer and paint not included | Homewyse | Surface condition, ceilings, number of passes |
| Plaster patch | $315 to $494 per patch | Homewyse | Loose plaster, lath condition, matching an old wall |
| Patching and sanding as part of a repaint in NJ | About $0.50 to $0.75 per square foot | Our cost guide | How much of the wall needs work before paint |
Two things stand out. First, the per-repair numbers are high compared with the size of the damage. Homewyse's estimate of $303 to $481 for one repair covers labor for cutting, patching, taping, mudding and sanding, plus supplies, delivery and site preparation, and it leaves out contractor overhead, sales tax and any framing, electrical or plumbing work. This Old House puts the same reality another way: about $50 to $80 per square foot of repair, or $60 to $100 per hour. A two-square-foot repair runs $100 to $160 by its figures and a ten-square-foot repair $500 to $800.
Second, the cost to repair drywall drops sharply when the person doing it is already in the room. A patch needs several coats of compound with drying time between them, then sanding, primer and paint. A special trip has to cover those return visits. A painting crew already in the house does the same steps between other tasks.
Cost to patch drywall on its own vs as part of a paint job
Our cost guide says what is included in our interior price: nail holes, dents and cracks patched and sanded, gaps at trim and ceilings caulked, and spot priming on every patch and stain. That covers the ordinary wear in a lived-in room. When walls need real work before paint, the guide lists patching and sanding at about $0.50 to $0.75 per square foot on its own, on top of an interior repaint that runs $2 to $6 per square foot of floor area. Walls alone are $1 to $2 per square foot and ceilings $1 to $2.50 per square foot in the same guide. Our guide to what it costs to paint a house in NJ walks through how those lines add up on a full estimate.
So if you are researching the cost to patch drywall because you plan to repaint anyway, get the repair and the painting quoted together.
Drywall hole repair cost: small holes vs large holes
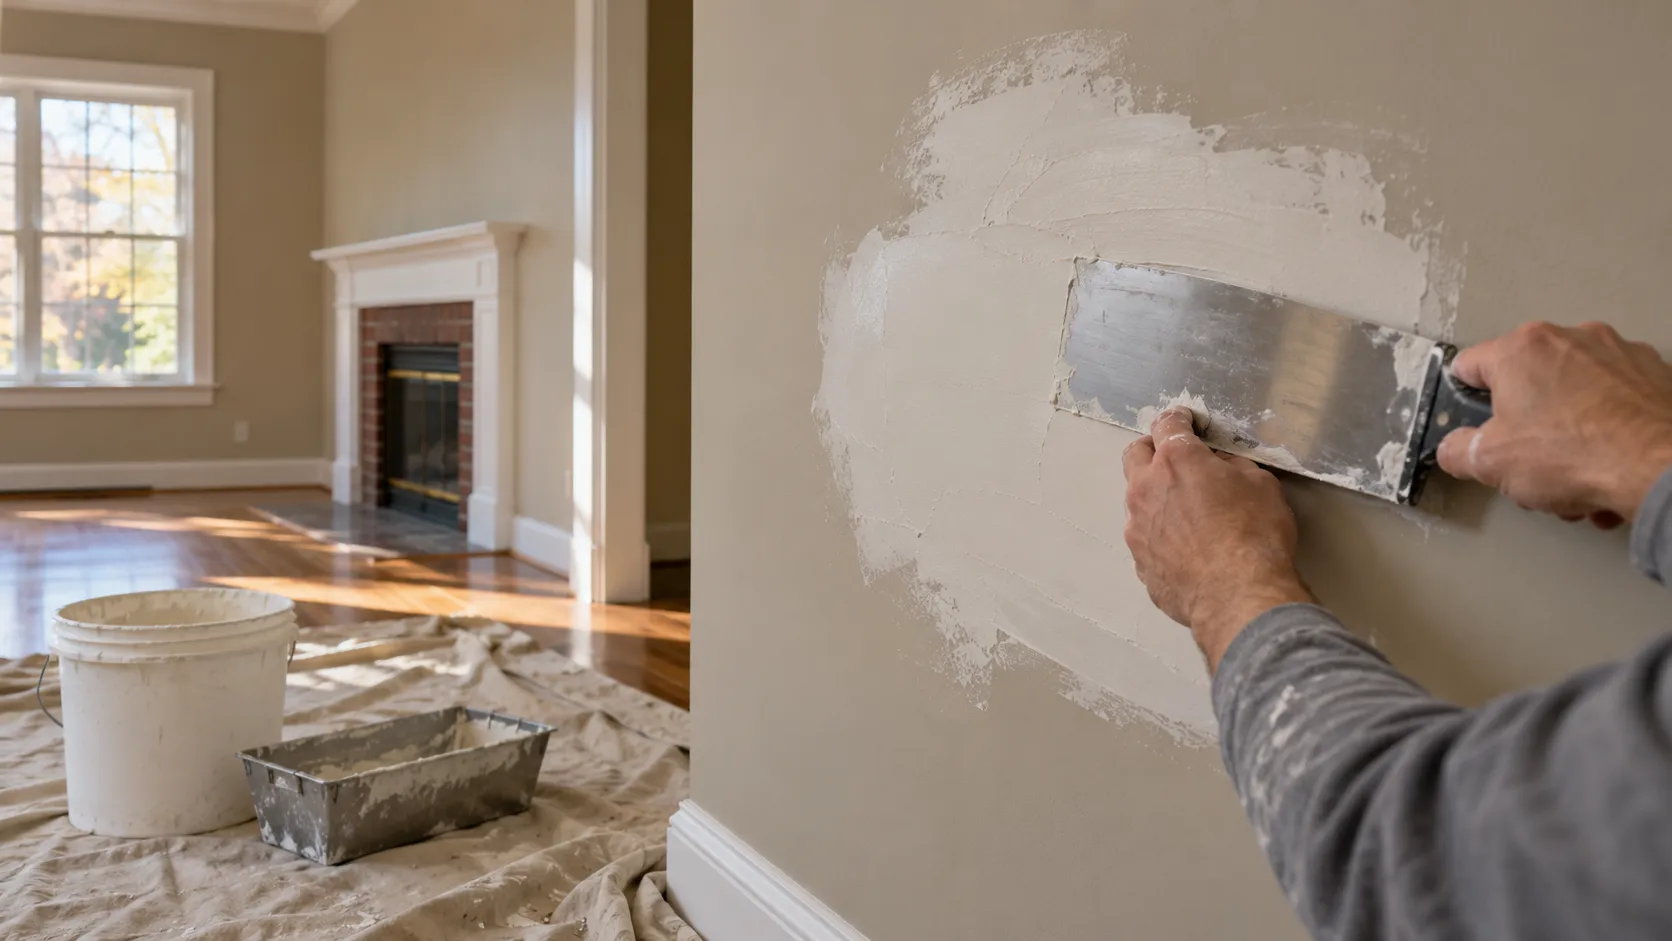
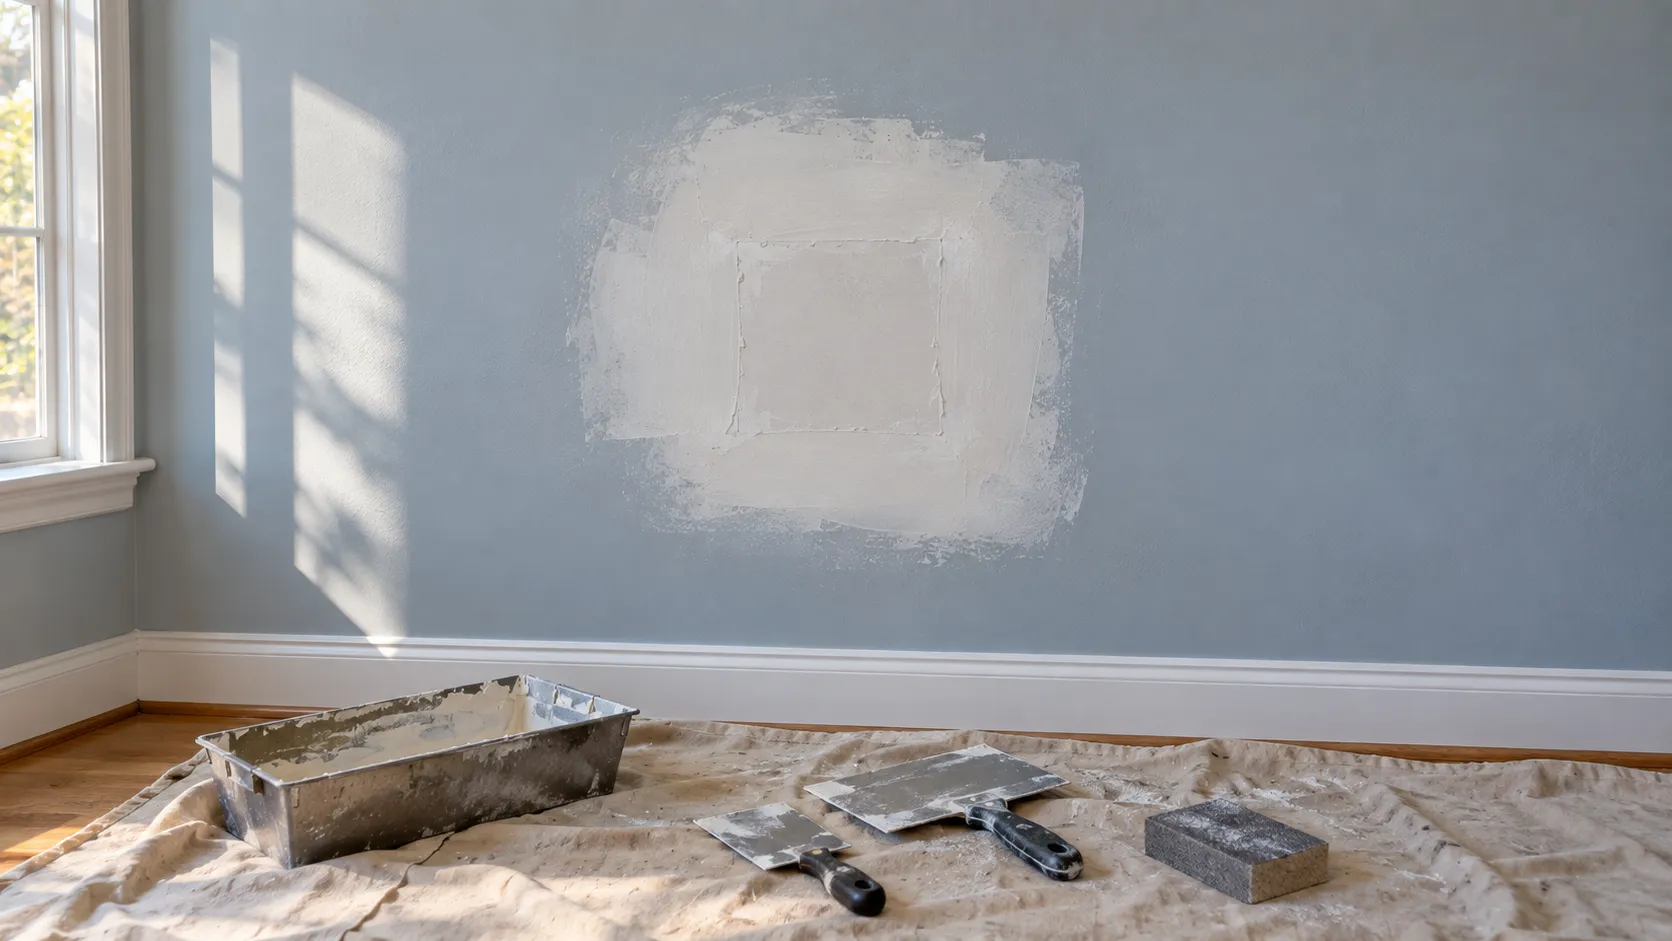
A doorknob hole, an anchor that pulled out and a hole left by an electrician are three different repairs. Small holes are filled. Anything bigger than a few inches needs a piece of new board, something behind it to screw to, tape on every edge and three coats of compound feathered well past the patch. Benjamin Moore's guide to fixing a hole in the wall starts the same way we do: "Square off the edges of the hole to create straight sides." It ends with sanding the dried compound "being careful not to over-sand so that the tape shows," and priming the entire patch area before paint.
That is why drywall hole repair cost climbs faster than the size of the hole. Bob Vila's guide, citing Fixr, says a professional will charge at least $75 for small holes up to 4 inches across and $200 to $550 to repair multiple holes and cracks in a single room. This Old House starts large holes at $100. In our experience the finishing, not the cutting, is where the time goes: a patch that is flat, feathered wide and primed disappears, and one that is rushed shows as a raised rectangle every time the light comes across it.
Ceiling drywall repair cost
Ceiling drywall repair cost runs higher than the same repair on a wall. This Old House says "drywall ceiling repair is more challenging than working on walls, so installation costs will usually be higher," and gives $320 to $1,300 for ceiling holes. Homewyse's September 2026 figure for a drywall ceiling repair is $374 to $481 per patch. The work is overhead, gravity works against wet compound, and a ceiling is usually lit at a low angle by windows, which shows every ridge. If the ceiling is textured, the patch has to be textured to match or the whole ceiling has to be dealt with; our popcorn ceiling removal cost guide covers that situation. Our cost guide prices ceiling painting at $1 to $2.50 per square foot, and notes that scraping a popcorn ceiling runs $1 to $2 per square foot plus skim coat and sand.
What Drives the Cost to Repair Drywall
- The trip. A single small repair carries a minimum charge. The Homewyse per-repair figure includes delivery, site preparation and setup time, which is the same whether the hole is two inches or ten.
- Drying time and return visits. Compound goes on in thin coats. Each coat has to dry before the next, and the patch has to be primed before paint.
- Walls vs ceilings, and height. Overhead work and ladder or staging work are slower. Our cost guide prices two-story foyers, cathedral ceilings and open stairwells closer to $6 per square foot for painting for the same reason.
- Texture. A smooth wall can be feathered out. A textured wall or ceiling has to be matched, and our cost guide notes that heavy texture can add up to half again to the budget.
- The cause. A hole from a door handle has no cause to fix. A water stain, a recurring crack or a row of nail pops does, and the repair only lasts if the cause is dealt with first.
- The paint finish that goes over it. Flat paint forgives. Eggshell, satin and darker colors show patches unless the prep is taken further, which we explain below.
- The age of the house. In a pre-1978 home, sanding and cutting painted walls can disturb lead paint, and that changes how the work has to be set up. Plaster in older homes is its own trade.
- What is behind the wall. The national guides exclude framing, electrical, plumbing and hazardous-material work from their figures. If the board comes off and something is wrong behind it, that is a separate cost.
Cracks, Nail Pops and Stains: What They Mean and How They Are Fixed
Most of the damage we are asked to quote falls into four groups. Each has a usual cause, and the cause decides the fix.
Hairline cracks in walls
Hairline cracks in walls are usually movement, not failure. Wood framing swells and shrinks with the seasons, and the wall finish is rigid. PABCO Gypsum, a Gypsum Association member, explains in its technical note on ridging and cracking of gypsum panels that "wood framing changes dimensions as the moisture in the environment varies from season to season." In drywall the crack follows a joint between boards or runs from the corner of a door or window, where the framing concentrates the movement.
In plaster, the National Park Service's Preservation Brief 21, "Repairing Historic Flat Plaster: Walls and Ceilings", is reassuring about the small ones: "Hairline cracks in wall and ceiling plaster are not a serious cause for concern as long as the underlying plaster is in good condition. They may be filled easily with a patching material."
Drywall crack repair that lasts means bridging the crack, not just filling it. Compound pushed into a crack with a fingertip will open again with the next heating season. For cracks that reopen, the Park Service describes the method: widen the crack slightly, fill it, and for more persistent cracks "bridge the crack with tape," with a fiberglass mesh tape "pressed into the patching material," followed by a second coat to cover the tape and a third to even out the surface. We do the same on drywall, with tape over the crack and compound feathered wide on both sides so the repair does not read as a ridge.
Timing matters too. PABCO advises that repairs to seasonal cracking and ridging wait until the movement has settled, "typically, after a full year allowing for a heating and cooling cycle to complete." In a newer house, that means the cracks that show up in the first winter are best fixed once, after the framing has dried out, not three times along the way.
Cracks in ceiling drywall and plaster
Cracks in ceiling surfaces follow the same rules, with more at stake. A straight crack along a drywall joint is a tape or movement problem and is repaired by retaping and recoating. The Park Service notes that in older ceilings, "heavy loads in a storage area above a rock-lath ceiling can also cause ceiling cracks," and that horizontal cracks in plaster are often lath movement: "because it absorbs moisture from the air, wood lath expands and contracts as humidity rises and falls. This can cause cracks to appear year after year."
The ceiling cracks that are not cosmetic look different. The Brief warns that "hairline cracks and holes may be unsightly, but when portions of the ceiling come loose, a more serious problem exists," and that in that case "the keys holding the plaster to the ceiling have probably broken." A plaster ceiling that sags, moves when pressed or has dropped along a crack needs a plasterer before it needs a painter. So does a drywall ceiling that is bowing between joists.
Nail pops in drywall
Nail pops in drywall are the small round bumps, sometimes with a ring of cracked paint, that appear in rows on walls and ceilings. The Gypsum Association's bulletin GA-222, "Repairing Screw or Nail Pops", lists the causes, starting with "lumber shrinkage occurring after gypsum panel product application," and says plainly that "fastener pops are largely caused by lumber shrinkage due to initial high moisture content in the lumber." The stud or joist dries and shrinks back from the board, the board is no longer tight to the framing, and the fastener head pushes the compound off.
That is why, in our experience, nail pops show up most in the first few years of a new house or addition, and why they are not a sign that anything is wrong with the structure.
How to fix nail pops
How to fix nail pops properly comes down to re-securing the board, not just covering the bump. GA-222 gives the method: fastener pops "are repaired by reattaching the gypsum panel product to the framing by driving a new screw or nail of the proper length into the same framing member about 1-1/2 in. (40 mm) from the protruding fastener." You press the board tight to the framing as you do it, then "remove the fastener or reseat the protruding fastener so that it is just below the face of the gypsum panel," clear any loose material, and finish with joint compound.
Hammering the old nail back in and smearing spackle over it is the repair that fails. The board is still loose, so the nail comes back. We drive a drywall screw beside each pop, set or pull the old fastener, then give each spot three thin coats of compound, sand, and prime.
The same bulletin has a useful note on timing. Pops that appear before or during decorating should be repaired right away, but those that appear "one or more months into the heating season are usually a result of lumber shrinkage and should not be repaired until the end of the heating season." If your house is new and you are planning its first repaint, spring is a better time to fix the pops than December.
Nail pops in ceiling drywall
Nail pops in ceiling drywall are the same problem with gravity added. The board hangs from its fasteners, so a ceiling with a line of pops along a joist may have a panel that has dropped slightly. The fix is the same GA-222 procedure, pushing the panel up tight before driving the new screws. In our experience ceilings need more pops fixed than the owner counted, because they only show clearly when a work light is held flat to the surface. We mark them all before quoting.
Water stain on ceiling drywall
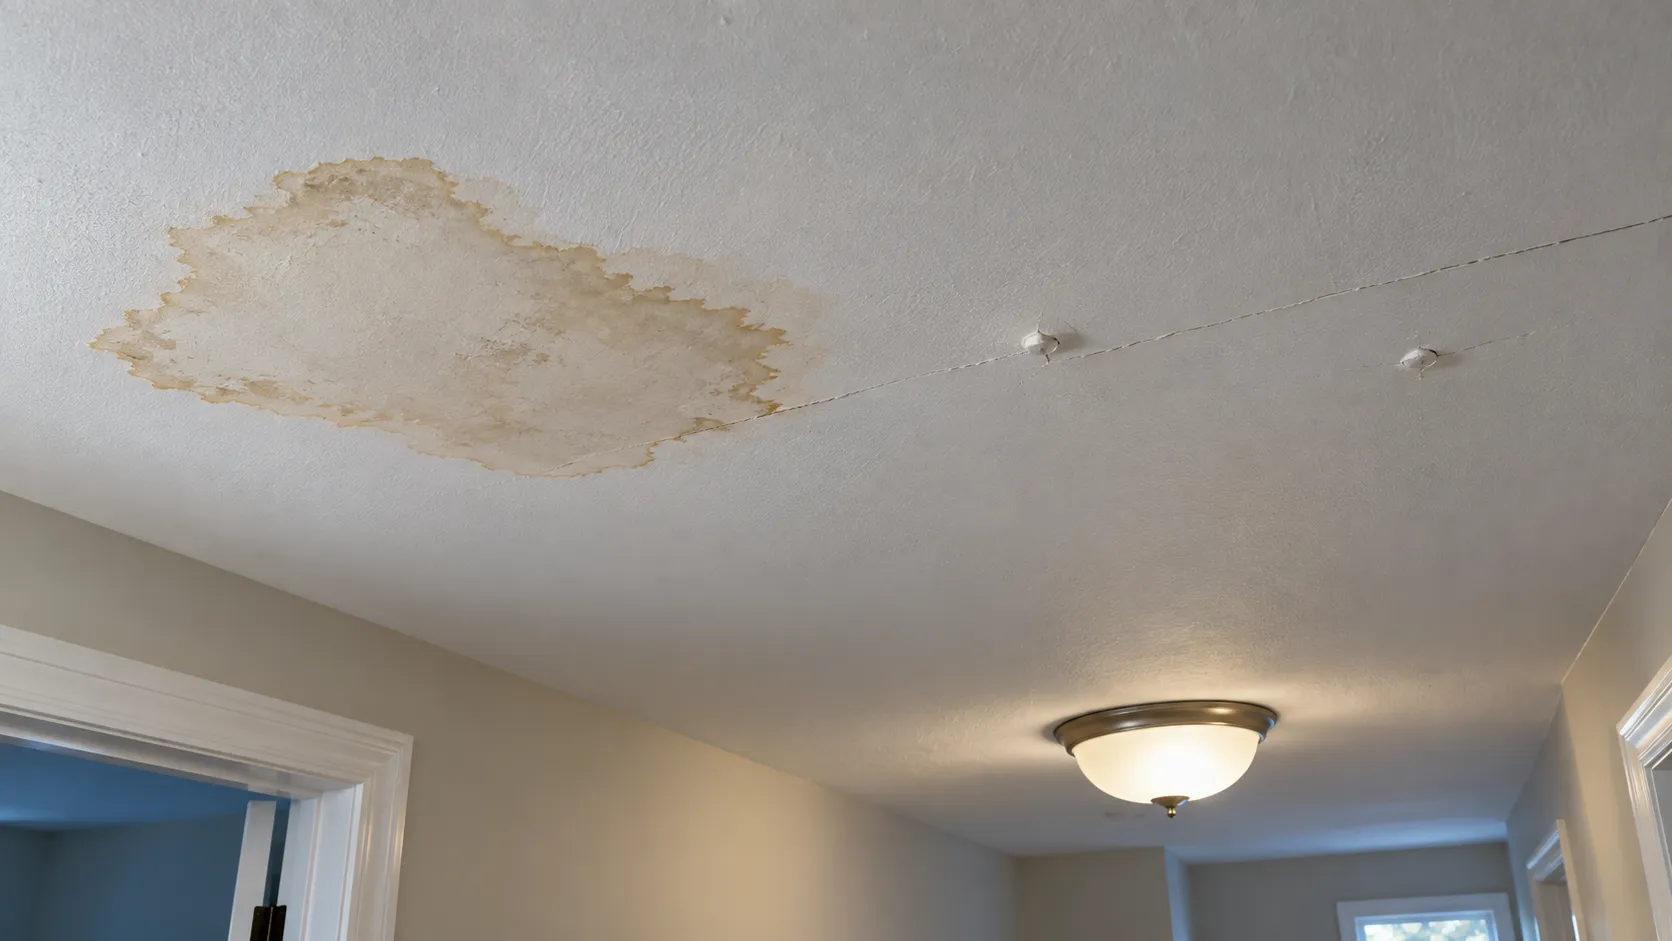
A water stain on a ceiling is two problems: where the water came from, and what it left behind. The order is not negotiable. Sherwin-Williams' interior surface preparation FAQ answers a question about covering a water-stained but otherwise undamaged ceiling this way: "After you have corrected the cause of the water staining, use a primer sealer designed for stain blocking." It adds that such primers are designed to lock in the stain so it does not bleed through into the topcoat, and for a stained ceiling that needs repair it advises to "take care of all the repair work first, then apply an alkyd primer-sealer."
Ordinary ceiling paint will not hide a water stain. In our experience the brown ring comes back through latex paint within days, however many coats go on. A stain-blocking primer is the fix. Sherwin-Williams describes its White Synthetic Shellac Primer as one that "seals in damage caused by water leaks," and Benjamin Moore's Insl-X Reduced Odor Oil-Based Primer is described as "effective at sealing water stains, tannin, nicotine stains and more." Our Benjamin Moore vs Sherwin-Williams guide compares the two brands more broadly.
If the board is dry, flat and hard when pressed, a stain is a priming job. If it is soft, sagging, crumbling or smells musty, it is a replacement job, and possibly a mold job. We cover that under water damage below.
Water Damage Drywall Repair Cost
We did not find a national figure for water damage drywall repair cost that we could verify, so we are not going to give one. What we can say is how the cost is built. The first cost is stopping the water, and that bill belongs to a plumber or roofer. The second is how much board got wet. A dry, stained area is primed and painted. Board that stayed wet is cut out and replaced, which is priced like a large patch or a ceiling repair in the table above. The third is mold.
The EPA's Brief Guide to Mold, Moisture and Your Home sets the clock: "It is important to dry water-damaged areas and items within 24-48 hours to prevent mold growth." It also explains why a stain can be the visible part of a bigger problem: "Mold may be hidden in places such as the back side of dry wall, wallpaper, or paneling, the top side of ceiling tiles, the underside of carpets and pads, etc." And it rules out the shortcut: "Do not paint or caulk moldy surfaces. Clean up the mold and dry the surfaces before painting."
On size, the EPA says that if the moldy area is "less than about 10 square feet (less than roughly a 3 ft. by 3 ft. patch), in most cases, you can handle the job yourself." Above that, or where there has been a lot of water damage, it points to professional remediation guidance. This Old House puts remediation for toxic mold at around $2,300 on average. We do not do mold remediation or plumbing. When we find wet board or suspect mold, we stop, tell you, and come back to repair and paint once the leak is fixed and the area is dry and cleared.
Plaster vs Drywall in Older New Jersey Homes
Plaster vs drywall is the first thing we check in an older house, because the repairs are different. Drywall, which the Gypsum Association defines as sheet products with "a noncombustible core primarily of gypsum with paper surfacing," is screwed to the framing in panels and finished only at the joints and fasteners. Traditional plaster is a wet material troweled in coats over wood lath, metal lath or gypsum "rock lath."
The Park Service's Preservation Brief 21 says "plaster was the wall surface chosen for nearly all buildings until the 1930s or 40s," and that "by the late 1930s, rock lath was used almost exclusively in residential plastering." So a house from the 1920s is likely plaster on wood lath, a house from the 1940s or 1950s may well be plaster over rock lath, and later houses are usually drywall. Plenty of homes have both, with drywall in an addition or a remodeled kitchen. In our experience the quick checks are a knuckle and a pushpin: plaster sounds dense and resists the pin, drywall sounds hollow between studs and takes the pin easily.
Plaster is worth keeping. The Brief gives the reasons: "three-coat plaster is unmatched in strength and durability. It resists fire and reduces sound transmission." It also notes that "replacing plaster is expensive" and that "plaster is often not as badly damaged as it first appears."
Plaster wall repair: what a painter can do
Plaster wall repair at the level of cracks and small holes is painting prep. The Park Service says so directly: "fine cracks can be filled with an all-purpose drywall joint compound," and for bridging larger cracks with fiberglass tape, a "quick-setting" joint compound can be used, with all-purpose compound "as the final coat prior to sanding." That is our standard plaster repair before paint: tape and setting compound over the cracks, small holes filled in two passes, a wide finish coat, sanding and primer. Where an old plaster surface is soft or powdery, Sherwin-Williams' interior FAQ notes that wiping it with one part vinegar to four parts water "hardens the plaster so that it will accept a paint film."
Larger plaster work is a different trade. The Brief describes holes down to the lath being rebuilt in three layers over metal lath and loose ceilings being reattached to the lath, and it is frank about who should do that: "Plastering is a skilled craft, requiring years of training and special tools." When we find loose or bulging plaster, we recommend a plasterer and paint after their work has cured.
Plaster repair cost
Plaster repair cost for a single patch runs $315 to $494 nationally according to Homewyse (September 2026), close to its drywall figure, because the same trip and setup costs apply. The spread comes from what is under the surface. A hairline crack in sound plaster costs no more to fix than one in drywall. A patch where the plaster has lost its grip on the lath costs more, and replastering is a plasterer's quote, not ours. Homewyse's figure excludes hazardous-material testing, which matters in old houses, as the next sections explain.
Levels of Drywall Finish, and Why Patches Flash Under Paint
The drywall industry grades how far a surface has been finished on a scale from Level 0 to Level 5, set out in the Gypsum Association's GA-214, "Levels of Finish for Gypsum Panel Products", a document presented jointly with the Painting Contractors Association and other trade groups. Two levels matter in a house:
- Level 4 is the normal finish in living areas: tape embedded at every joint, two more coats over flat joints, and fasteners "covered with three (3) separate coats of joint compound." GA-214 says it is for smooth walls "decorated with flat paints, light textures, non-continuous textures," and adds that "non-flat or dark/deep tone paints are not recommended; refer to Level 5."
- Level 5 is Level 4 plus "a skim coat of joint compound or a material manufactured especially for this purpose" applied "to the entire surface." It is specified where walls get non-flat paints, dark or deep colors, "or critical lighting conditions occur."
The same logic applies to a repair. A patch is a small area of new joint compound in the middle of an old painted wall, and GA-214 is candid that "any patching or touch-up of even minor damage subsequent to the final finish may be difficult to conceal." There are two ways a patch gives itself away.
The first is shape. If the compound is not feathered far enough, the patch shows as a raised area in side light. GA-214 calls strong side lighting from windows or fixtures "critical lighting" and notes that it "may exaggerate minor surface differences," and that "non-flat and dark/deep tone paints highlight minor surface differences."
The second is flashing. Sherwin-Williams defines paint flashing as "an uneven appearance of a paint coating's gloss, sheen or luster," lists "coating over a porous surface" among the causes, and gives the fix: "Spot-prime any patched areas to level off the porosity." Bare joint compound is far more absorbent than the painted wall around it. Paint applied straight over it dries duller, and you see the patch as a dull spot even when it is perfectly flat. GA-214 makes the same recommendation at every finish level from 3 up, that the painting specification "include the application of a priming material prior to the decoration."
So we prime every patch. Where a wall has many repairs, in our experience it is better to prime the whole wall than to spot-prime twenty places, and where the finish will be eggshell or satin we paint the full wall corner to corner instead of touching up. Our paint sheen guide explains why the shinier finishes are less forgiving of wall repairs, and our article on why paint peels covers what happens when new paint goes over a surface that was not prepared for it.
Cost to skim coat walls
When a wall has too many repairs to hide one by one, or the old surface is rough from wallpaper removal or decades of patching, the answer is a skim coat. GA-214 describes skim coating as "a process intended to conceal minor surface differences and create a more uniform surface," done with a broad knife that forces compound into the surface and shears off the excess.
The cost to skim coat walls is $0.96 to $1.36 per square foot nationally according to Homewyse (September 2026). That figure covers labor and materials for basic skim coating in favorable conditions and lists priming and painting as a separate line, so the finished skim coating cost of a room is higher than the headline number once primer and two coats of paint are added. In our own cost guide, skim coat and sand is part of popcorn ceiling work, heavy texture can add up to half again to an interior budget, and wallpaper removal runs near $3 per square foot.
A skim coat is not a cure for everything. GA-214 notes that "skim coating will not approximate a plastered finish/surface," and it will not hold a moving crack or loose plaster. It makes a sound but ugly surface uniform, which is what a satin finish or a dark color needs.
Our Wall Repair Process Before Painting
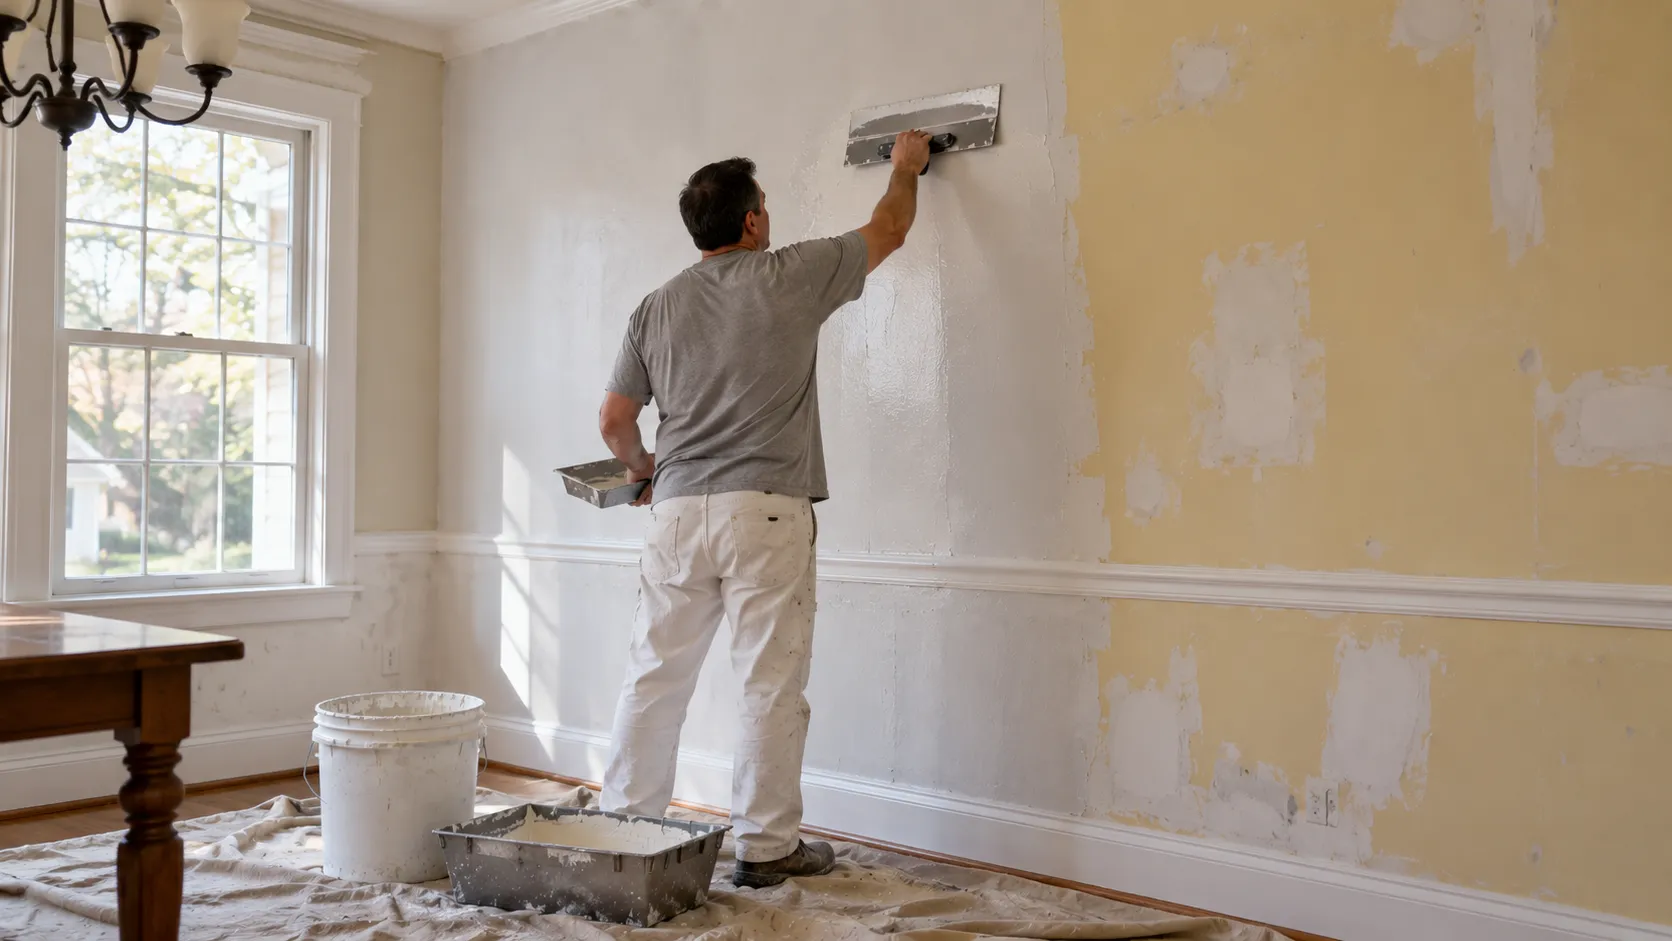
This is the sequence we follow when repairs are part of an interior painting job. The same steps apply in offices, retail spaces and tenant fit-outs on our commercial painting work, where walls usually carry years of anchor holes.
- Find everything. We go over walls and ceilings with a work light held close to the surface and mark every pop, crack, dent and old patch. Damage that is invisible in daylight shows under a new coat of paint.
- Diagnose before patching. A stain gets traced to its source. A crack gets checked for width, direction and whether it has been patched before. Anything that looks like a leak, mold or structural movement is raised with you before any repair.
- Check the age of the house. In a pre-1978 home we treat painted surfaces as possibly containing lead until testing shows otherwise, and plan the dust control around that.
- Protect the room. Furniture is moved and covered and floors are protected, because sanding compound makes fine dust.
- Re-secure and cut out. Nail pops get a new screw beside them, per GA-222. Loose tape is cut out. Damaged board is squared off and replaced, with backing behind the patch.
- Tape and first coat. Cracks and patch edges are taped. For the first fill we use a setting-type compound, which the Park Service notes "dries because of a chemical reaction, not because of water evaporation" and "shrinks less than all-purpose joint compound."
- Second and third coats. Each coat is wider than the last, so the repair fades into the wall. This is where a patch is won or lost.
- Sand and check with a light. We sand lightly, wipe down the dust and check again in raking light. Anything that shows gets another pass.
- Prime. Every patch is spot-primed, stains get a stain-blocking primer, and heavily repaired walls are primed in full.
- Paint the whole surface. Two finish coats of Benjamin Moore or Sherwin-Williams, wall to wall, so the sheen is even.
DIY or Hire It Out?
Plenty of this is reasonable to do yourself. This Old House says "small drywall repairs, such as holes from nails and screws, are well within the abilities of most homeowners," and puts the materials at $10 to $30. Filling picture-hanger holes, fixing a handful of nail pops with screws and compound, and bridging a hairline crack with tape are weekend jobs. The EPA says a moldy area under about 10 square feet is one that in most cases you can handle yourself, following its cleanup guidance.
Where homeowners tend to get stuck, in our experience, is the last ten percent: feathering wide enough, sanding without scuffing the paper face of the board, and priming so the patch does not flash. A patch that looks fine bare can show clearly under eggshell paint. Ceilings, textured surfaces, large patches and anything in a room with strong window light are where hiring it out pays for itself.
Two cautions before you sand or cut into an old wall:
- Lead. The EPA's Renovation, Repair and Painting program requires that "anyone paid to perform work that disturbs painted surfaces in homes, childcare facilities and preschools built before 1978 be certified." The EPA treats very small jobs as minor repair and maintenance, but as our cost guide notes, the lead-safe rules apply to paid work that disturbs more than six square feet of painted surface in a room, and wall repair across a room passes that quickly. The dust is a hazard to you as well if you do the work yourself. See our guide to lead paint in older NJ homes.
- Asbestos. The EPA's asbestos overview lists "textured paint and patching compounds used on walls and ceilings" among the places asbestos may be found in homes, and the Park Service notes that in old plaster, "asbestos, used in the mid-twentieth century as an insulating and fireproofing additive, may also be present." The EPA's guidance for homeowners is direct: "Don't saw, sand, scrape, or drill holes in asbestos-containing materials." If you have an old textured ceiling or do not know what an old wall is made of, have it tested before sanding.
When It Is Not a Painter's Job
We repair walls and ceilings as preparation for paint. We want to be clear about where that stops, because paint and compound over the wrong problem wastes your money.
- An active or unexplained leak. A plumber or roofer comes first. The Park Service's caption on a water-damaged dining room says it simply: "After fixing the leaking pipes, the wall covering and rotted plaster will need to be replaced and any holes repaired."
- Mold beyond a small patch, or mold you can smell but not see. The EPA advises that "if you believe that you may have a hidden mold problem, consider hiring an experienced professional." We do not do mold remediation. We repair and paint after it is done.
- Large areas of soaked, sagging or crumbling board. Replacing whole ceilings or hanging full rooms of new board is a drywall contractor's job. We can prime and paint it afterwards.
- Cracks that are structural. The Park Service describes stress cracks "appearing as diagonal lines in a wall" that "usually start at a door or window frame," and says "diagonal cracks running in opposite directions suggest that house settling and soil conditions may be at fault." Its rule of thumb is the one we follow: "If a crack seems to be expanding, a structural engineer should be consulted." In our experience the signs worth a second opinion are a crack that keeps getting wider, one edge standing proud of the other, doors nearby that have started to stick, or a patched crack that returns.
- Loose or bulging plaster. When the keys behind a plaster ceiling have broken, the ceiling needs to be reattached or replastered by a plasterer.
- Suspected asbestos or lead abatement. Testing and abatement are separate, licensed work.
Get the Repairs and the Paint Quoted Together
If you are pricing wall repairs ahead of a repaint, have both looked at in one visit. NJ Painting Co. is a family-owned, licensed and fully insured painting company at 36 Church Rd, Morganville, NJ 07751, working on New Jersey homes for more than 20 years with Benjamin Moore and Sherwin-Williams products. Every estimate is free, includes an in-home color consultation, and spells out the repairs, primer and number of coats; our work carries a two-year workmanship warranty. See our interior painting service and the full cost guide, check coverage on our Monmouth County, Middlesex County and Ocean County pages, or call (732) 239-0932 and request a free estimate.
Frequently Asked Questions
How much does drywall repair cost?
As a standalone job, Homewyse puts one professional drywall repair at about $303 to $481 nationally (September 2026), and This Old House gives $60 to $200 for small holes and $450 to $2,000 for a whole-house repair list. As part of a repaint, our cost guide lists patching and sanding at about $0.50 to $0.75 per square foot, and routine nail holes, dents and cracks are included in our interior painting price.
What is the cost to patch drywall holes?
This Old House puts small holes at $60 to $200 professionally, a 2-inch hole at about $60 to $100, and large holes at $100 and up, or roughly $50 to $80 per square foot of repair. Bob Vila, citing Fixr, says to expect at least $75 for a small hole and $200 to $550 for several holes and cracks in one room. Drywall hole repair cost is driven more by the trip and the finishing coats than by the size of the hole.
How much does ceiling drywall repair cost?
This Old House gives $320 to $1,300 for ceiling holes, and Homewyse gives $374 to $481 per drywall ceiling patch (September 2026). Ceilings cost more than walls because the work is overhead and ceilings show flaws in low-angle light. If the ceiling is stained, the leak has to be fixed and the stain sealed with a stain-blocking primer before painting.
What causes nail pops in drywall, and how do you fix nail pops?
The Gypsum Association says fastener pops are largely caused by lumber shrinkage: the framing dries and pulls back from the board. The fix in its bulletin GA-222 is to drive a new screw into the same framing member about 1-1/2 inches from the pop, press the board tight, remove or reseat the old fastener just below the surface, then finish with joint compound, primer and paint. Nail pops in a ceiling are repaired the same way.
Are hairline cracks in walls serious?
Usually not. Seasonal movement in wood framing causes most hairline cracks in walls, and the National Park Service says hairline cracks in plaster are not a serious cause for concern as long as the plaster underneath is sound. Tape and compound fix them. Cracks that are diagonal, wide, offset or growing are different, and an expanding crack should be looked at by a structural engineer.
Can I just paint over a water stain on the ceiling?
No. Fix the source of the water first, make sure the board is dry and firm, then seal the stain with a stain-blocking primer before the ceiling paint. Sherwin-Williams advises correcting the cause and then using a primer sealer designed for stain blocking. If the area is soft or moldy, the EPA says not to paint over it; it has to be cleaned up or replaced first.
What is the difference between plaster and drywall, and what does plaster repair cost?
Plaster is troweled on wet in coats over lath and was the standard wall surface until the 1930s or 40s; drywall is gypsum board screwed to the framing and finished at the joints. Small plaster cracks and holes are repaired with tape and joint compound much like drywall. Homewyse puts a plaster patch at $315 to $494 nationally (September 2026). Loose or bulging plaster needs a plasterer.
How much does it cost to skim coat walls?
Homewyse puts skim coating at $0.96 to $1.36 per square foot nationally (September 2026), not including primer and paint. A skim coat is worth it when a wall has too many old patches to hide individually, after wallpaper removal, or when you want a satin finish or a dark color on walls that were only finished for flat paint.
About the author
Written by the NJ Painting Co. team
NJ Painting Co. is a family-owned painting contractor based in Monmouth County, in business since 2004. We are licensed and fully insured, work with Benjamin Moore and Sherwin-Williams paints, and back our work with a 2-year workmanship warranty. We serve Monmouth, Middlesex, Ocean, Mercer, Somerset and Burlington counties.