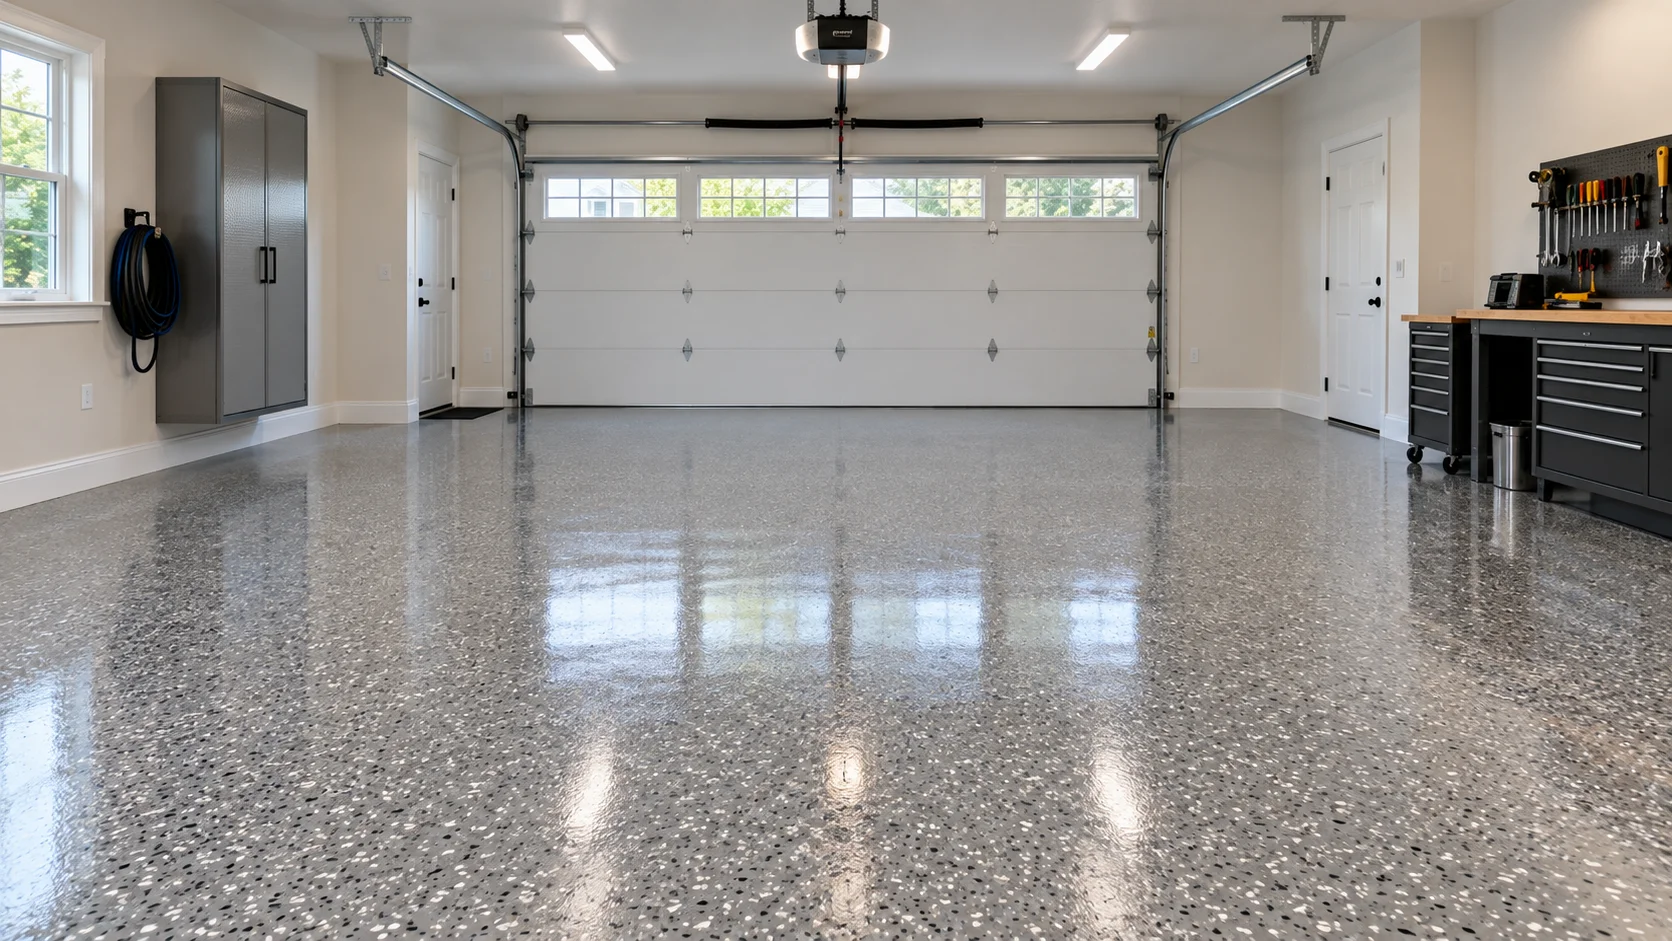
A professionally installed epoxy garage floor costs about $3 to $12 per square foot, which is roughly $1,200 to $4,800 for a 400 sq ft two-car garage before any slab repair. Polyaspartic systems run about $4 to $9 per square foot, and doing it yourself costs $2 to $5 per square foot. In New Jersey, where painter wages run about 20 percent above the national median, plan on quotes in the middle and upper part of those ranges. The spread is almost entirely about surface preparation and resin chemistry, not about the color you pick.
We install these floors across Monmouth, Middlesex, Ocean, Mercer, Somerset and Burlington counties, plus Union, Essex, Hudson, Bergen and Passaic in North Jersey, and the question we field on nearly every estimate is some version of "why is yours four times the price of the kit at the home center?" This article is the long answer. It covers what each coating type actually costs, how the four common systems differ chemically, what we do to a slab before any resin touches it, and — the part that matters most in this state — which systems hold up to road salt tracked in off the Parkway and a winter that crosses the freezing line over and over.
What an Epoxy Floor Costs in New Jersey, by Size
Garage floor coatings are priced by the square foot, and the per-foot number moves with the system you choose and the condition of the slab underneath. This Old House's epoxy floor cost guide (updated March 2026) puts professional installation at $3 to $12 per square foot and DIY at $2 to $5, and lists metallic finishes as a $5 to $12 per square foot add-on. Bob Vila's polyaspartic cost guide puts polyaspartic coatings at $4 to $9 per square foot.
New Jersey sits in the upper half of those ranges for a plain reason: the work is mostly labor. Bureau of Labor Statistics data on O*NET's New Jersey painter wage page puts the 2025 median at $28.49 an hour here against $23.75 nationally. A lot of Central Jersey's housing also has older garage slabs that need crack and spall repair before anything is coated.
The table multiplies those published per-foot ranges by typical floor areas, so you can redo the math for your own slab. It is a planning range built from published data, not our price list.
| Space | Typical square footage | Professional epoxy ($3 – $12 / sq ft) | Polyaspartic ($4 – $9 / sq ft) |
|---|---|---|---|
| 1-car garage | ~240 sq ft | $720 – $2,880 | $960 – $2,160 |
| 2-car garage | ~400 sq ft | $1,200 – $4,800 | $1,600 – $3,600 |
| 3-car garage | ~620 sq ft | $1,860 – $7,440 | $2,480 – $5,580 |
| Basement | ~1,000 sq ft | $3,000 – $12,000 | $4,000 – $9,000 |
Those numbers assume a sound slab. Here is what moves a quote up or down:
- Slab condition. Crack chasing, spall repair, and patching a pitted apron near the door is real labor. A slab that has been scaling from deicer exposure for fifteen years needs more than a grind and a coat.
- Old coating removal. Stripping a failed DIY kit or an old sealer is frequently the single largest line item on a re-do. We often charge more to coat a garage that has already been coated once than one that is bare.
- Moisture mitigation. If a slab tests wet, it needs a vapor-barrier primer, which is an extra coat of a specialty product. This is not an upsell — see the moisture section below.
- System build. A single-color epoxy with a clear topcoat costs less than a full-broadcast flake floor, which costs less than a metallic or a four-coat industrial build.
- Access and staging. Basements mean carrying grinders and vacuums down stairs and running dust extraction through a finished house. Garages we can back a trailer up to.
Our painting cost guide breaks epoxy down further by system (standard, high-build, flake, metallic, urethane mortar) and gives the same kind of ranges for interior, exterior and cabinet work.
The Four Options, Side by Side
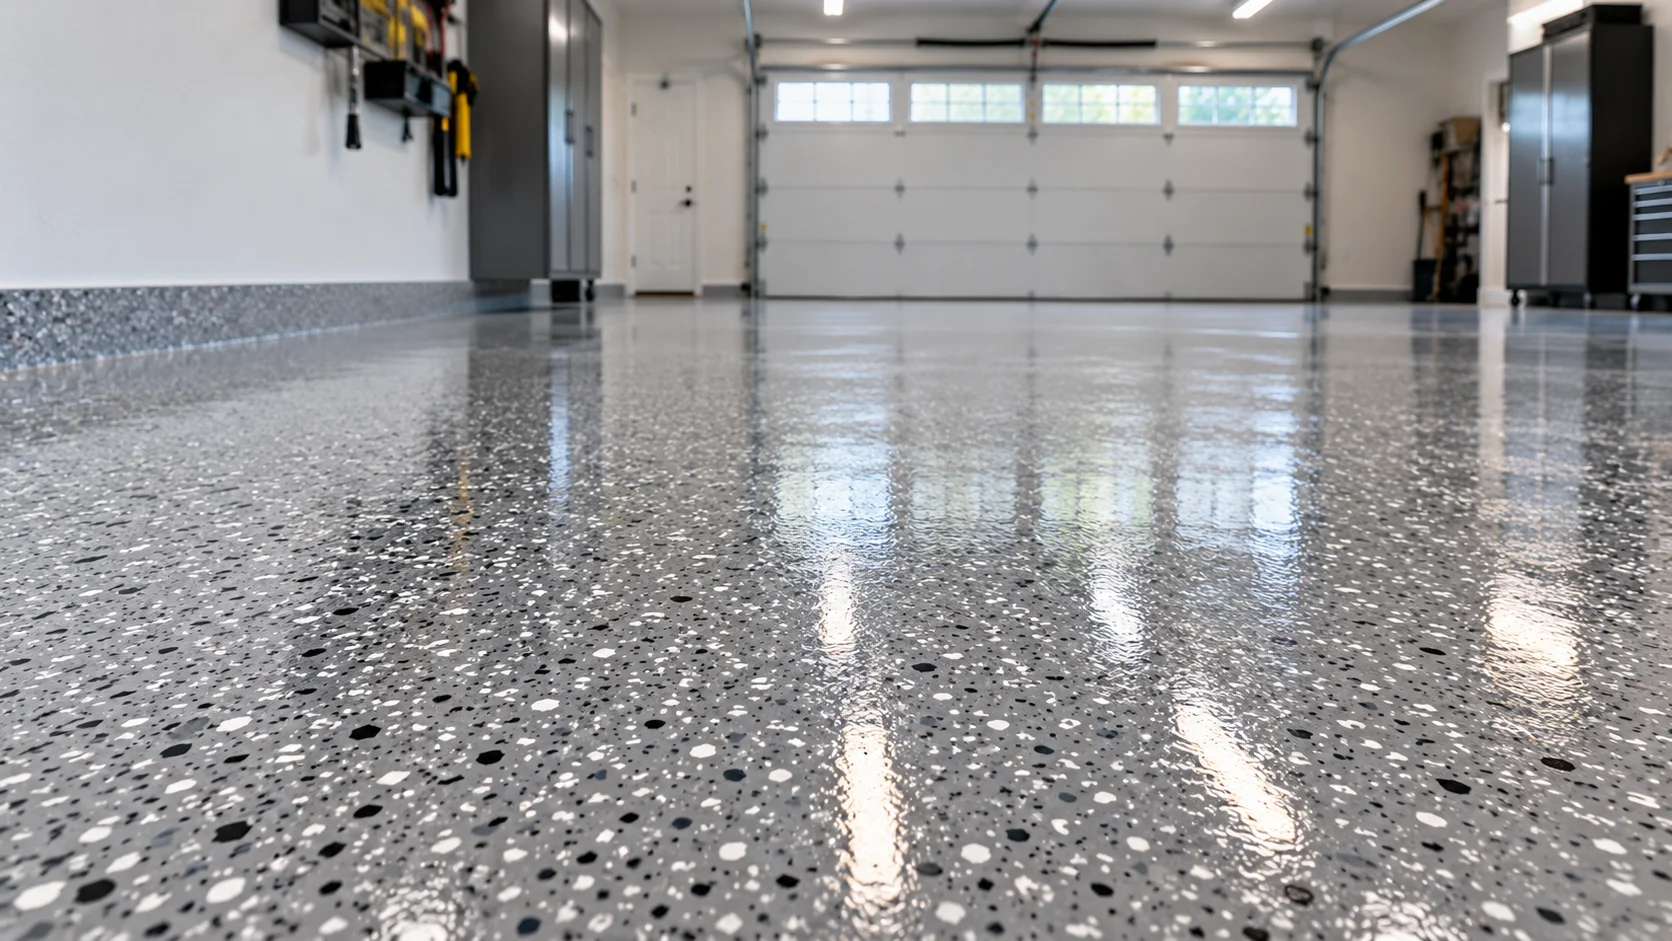
Homeowners usually think they are choosing a color. They are actually choosing a resin family, and the four common choices behave very differently. (If you are deciding on the look itself, our guide to epoxy floor types: flake vs metallic vs solid color vs quartz covers the finishes and which rooms each one suits.)
| Big-box DIY kit | 1-day polyaspartic | Professional epoxy + flake | Polyurea base + polyaspartic top | |
|---|---|---|---|---|
| Cost / sq ft | $2 – $5 (DIY, materials and tools) | $4 – $9 | $3 – $12 | Quoted per job; a two-product build |
| Install time | 1 weekend of your own labor | 1 day | 2 – 3 days | 1 – 2 days |
| Cure / return to service | Foot traffic 24 hr, vehicles 3 – 7 days | Walkable in 3 – 4 hr, vehicles ~24 hr | Recoat window 12 – 24 hr per coat; vehicles 5 – 7 days | Vehicles ~24 hr |
| Realistic lifespan | 1 – 3 years | 10 – 15 years | 10 – 20 years | 15 – 20 years |
| UV stability | Poor — ambers and chalks | Excellent (aliphatic, light-stable) | Ambers over time unless topcoated | Excellent with aliphatic topcoat |
| Film build | ~3 mils dry | ~15 – 20 mils system | 10+ mils per 100%-solids coat | 15 – 25 mils system |
| Best use | A shed or a rental you are about to sell | Sun-exposed garages, fast turnarounds, winter installs | Basements, workshops, chemical exposure, budget builds | Daily-driver garages, heavy vehicles, best all-round |
The big-box DIY kit
Most retail garage floor kits are water-based epoxy at roughly 50% solids, applied in one coat. Sherwin-Williams' own technical guidance on coating chemistry notes that a water-based product laid down at a 7-mil wet film dries to only about 3 to 3.5 mils dry, while a 100%-solids epoxy builds 10 mils or more in a single pass. So a kit is not a thinner version of a professional floor. It is roughly one third of one coat of one.
The kits also ship with a bottle of acid etch instead of any mechanical prep, which is the second half of why they fail. Three mils of water-based film sitting on an under-profiled slab has almost nothing to grip. It peels at the door first, then wherever a hot tire parks.
One-day polyaspartic
Polyaspartics are aliphatic polyurea resins — two-component, light-stable coatings that cure by cross-linking rather than by evaporation. Concrete Decor's technical overview describes primer coats going tack-free in 30 to 45 minutes, mid-coats ready to seal in about an hour, and topcoats walkable in three to four hours with vehicle traffic at 24 hours. That speed is what makes a same-day install possible.
The tradeoff is pot life. Once the two components are mixed, a crew has roughly 20 to 30 minutes of working time before the material starts to thicken in the bucket. There is no going back for a second pass and no forgiving a missed spot. Polyaspartic rewards an experienced crew and punishes a hesitant one, which is a real part of why it prices above epoxy.
Professional epoxy with flake broadcast
A 100%-solids epoxy base is still the toughest, most chemical-resistant, best-value body coat available for a residential floor, and it is self-leveling, so it hides minor slab imperfections that a thin polyaspartic will telegraph. Its weaknesses are cure time and light stability. Epoxy needs a recoat window of 12 to 24 hours between coats and generally wants five to seven days before vehicles park on it.
Polyurea base with a polyaspartic topcoat
This is what most high-end garage systems actually are, and it is worth understanding that polyurea and polyaspartic are not competitors — they are layers. A flexible polyurea base penetrates and bridges hairline cracks, flake is broadcast into it, and an aliphatic polyaspartic topcoat provides the wear surface and the UV protection. It is our default recommendation for an attached garage that sees a daily driver in a salt-belt state.
Preparation Is the Job
Every coating failure we are called in to fix traces back to one of two things: the slab was not profiled correctly, or the slab was wet. Prep is where the money goes, and it is the part a homeowner cannot see once the floor is done — which is exactly why cut-rate installers cut it.
Why we diamond grind instead of acid etch
Acid etching is what comes in the box with a DIY kit, and the industry moved away from it years ago. Sherwin-Williams published a direct statement that acid etching is no longer a recommended concrete prep method, for reasons worth repeating:
- It removes laitance but cannot remove curing compounds, oil, grease, or water-insoluble contaminants — all of which block adhesion.
- The reaction is hard to control, so a slab ends up unevenly over- and under-etched in patches.
- Over-etching makes the slab more porous, and the rinse water then drives deeper into it, raising rebar corrosion risk.
- It produces only a CSP-1 to CSP-2 profile, while modern high-solids systems need CSP-3 or rougher.
- It introduces gallons of water into a slab you are about to seal, which means a long wait or a moisture-tolerant primer.
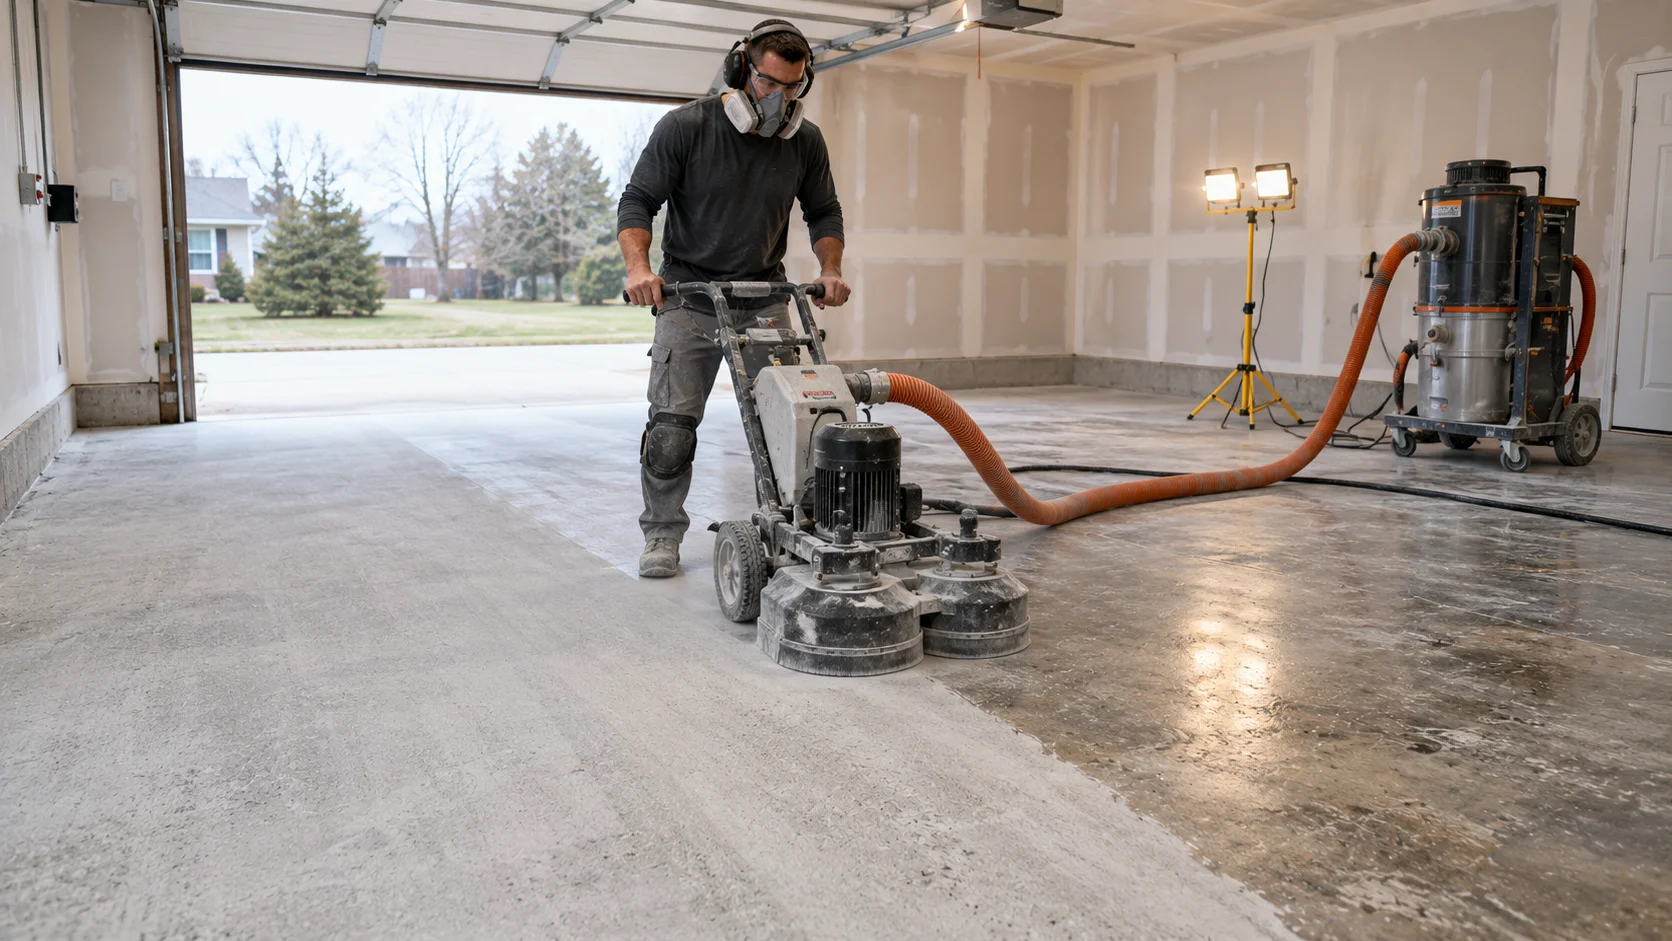
We run walk-behind diamond grinders with HEPA dust extraction instead. Grinding opens the pore structure mechanically, removes contaminants and any previous coating with the same pass, and gives us a measurable, repeatable profile. It is dusty, loud work — but with extraction running, we can grind a finished basement without coating the rest of the house in silica dust.
What a CSP number actually means
Concrete Surface Profile is the standardized way the trade specifies how rough a slab has been made. The International Concrete Repair Institute publishes the scale in Guideline 310.2R, "Selecting and Specifying Concrete Surface Preparation for Sealers, Coatings, Polymer Overlays, and Concrete Repair", along with physical benchmark chips — CSP 1 through CSP 10 — that an installer can hold against a ground slab to verify the profile matches what the coating manufacturer requires.
Thin sealers want CSP 1–2. Thin-film coatings want CSP 2–4. Self-leveling systems and heavy-build industrial floors want CSP 4 and up. Ask a contractor which CSP their system specifies and how they verify it. If the answer is a blank look, that tells you what you need to know.
Crack repair, joints, and the details
Before any primer, we chase structural cracks open with a crack saw, vacuum them, and fill with a rigid polyurea or epoxy mortar that is harder than the surrounding concrete. Spalled areas and the pitted apron near the overhead door get patched and re-ground flush. Control joints are a judgment call — filling them flush gives a seamless look but transfers movement into the coating, so on slabs that are still active we honor the joint and let it keep moving.
Moisture Testing: Non-Negotiable on a Jersey Basement Slab
This is the section we wish every homeowner read before hiring anyone. Concrete is porous, and a slab on grade releases water vapor continuously, sometimes for years. A cured epoxy film is essentially vapor-tight. Put one over a slab that is still pushing moisture and you have built a trap.
Sherwin-Williams' technical guidance on preventing blistering and disbondment in concrete floor finishes puts moisture vapor transmission at the top of the failure list and sets a working threshold of 3 pounds per 1,000 square feet per 24 hours, measured at use conditions, with concrete cured a minimum of 28 days before coating.
The two tests that matter
- ASTM F1869 — the anhydrous calcium chloride test. Formally titled "Standard Test Method for Measuring Moisture Vapor Emission Rate of Concrete Subfloor Using Anhydrous Calcium Chloride," it measures moisture vapor emission in pounds of moisture per 1,000 square feet over 24 hours. It applies to bare, uncoated concrete — below-grade, on-grade, and suspended — and it reflects conditions only at the time and location tested.
- ASTM F2170 — the in-situ relative humidity test. "Standard Test Method for Determining Relative Humidity in Concrete Floor Slabs Using in situ Probes" calls for probes drilled to 40% of the slab thickness for slabs drying from one side, with a 24-hour equilibration period before reading. This is the better indicator of what is happening deep in a slab, because it reads the moisture that is still on its way up rather than only what is leaving the surface today.
There is also ASTM D4263, the plastic sheet method, which is a quick field indicator of capillary moisture — tape a square of poly to the slab, come back later, look for condensation. It is useful as a screen. It is not a substitute for a quantitative test, because a slab can pass the plastic sheet test and still fail F1869 badly.
What happens when you skip it
Two related failures. Osmotic blistering occurs when water-soluble salts in the slab — chlorides, sulfates, nitrates — dissolve in moisture collecting at the bond line and draw more water through the film by osmotic pressure. The pressures involved can exceed the coating's bond strength by a wide margin, so the film lifts into water-filled blisters, usually a few weeks to a few months after install, usually in the coolest corner of the basement. Delamination is the broader version: sheets of coating releasing from the slab in a pattern that matches nothing you can see.
Neither one can be patched. The affected area has to be ground back to bare concrete and redone, this time with a moisture-mitigating primer. Moisture-vapor-barrier epoxy primers are rated to handle far higher readings than a standard system: Sherwin-Williams, for example, rates its Resuprime MVP3 to bring emissions of up to 24 lb/1,000 sq ft/24 hr down to 3 lb or less, on slabs with internal RH as high as 99 percent. That extra coat costs money, but it is dramatically cheaper than paying for a teardown.
Older Central Jersey basements are the exact profile where this bites. Slabs poured before vapor retarders were standard, no perimeter drainage, a high water table in parts of Monmouth and Ocean counties. If someone quotes a basement floor without testing it, that quote is a guess. We test, and if the numbers come back high we say so before we take the job, rather than coating a slab that is going to push the coating back off.
How a Flake Floor Actually Goes Down
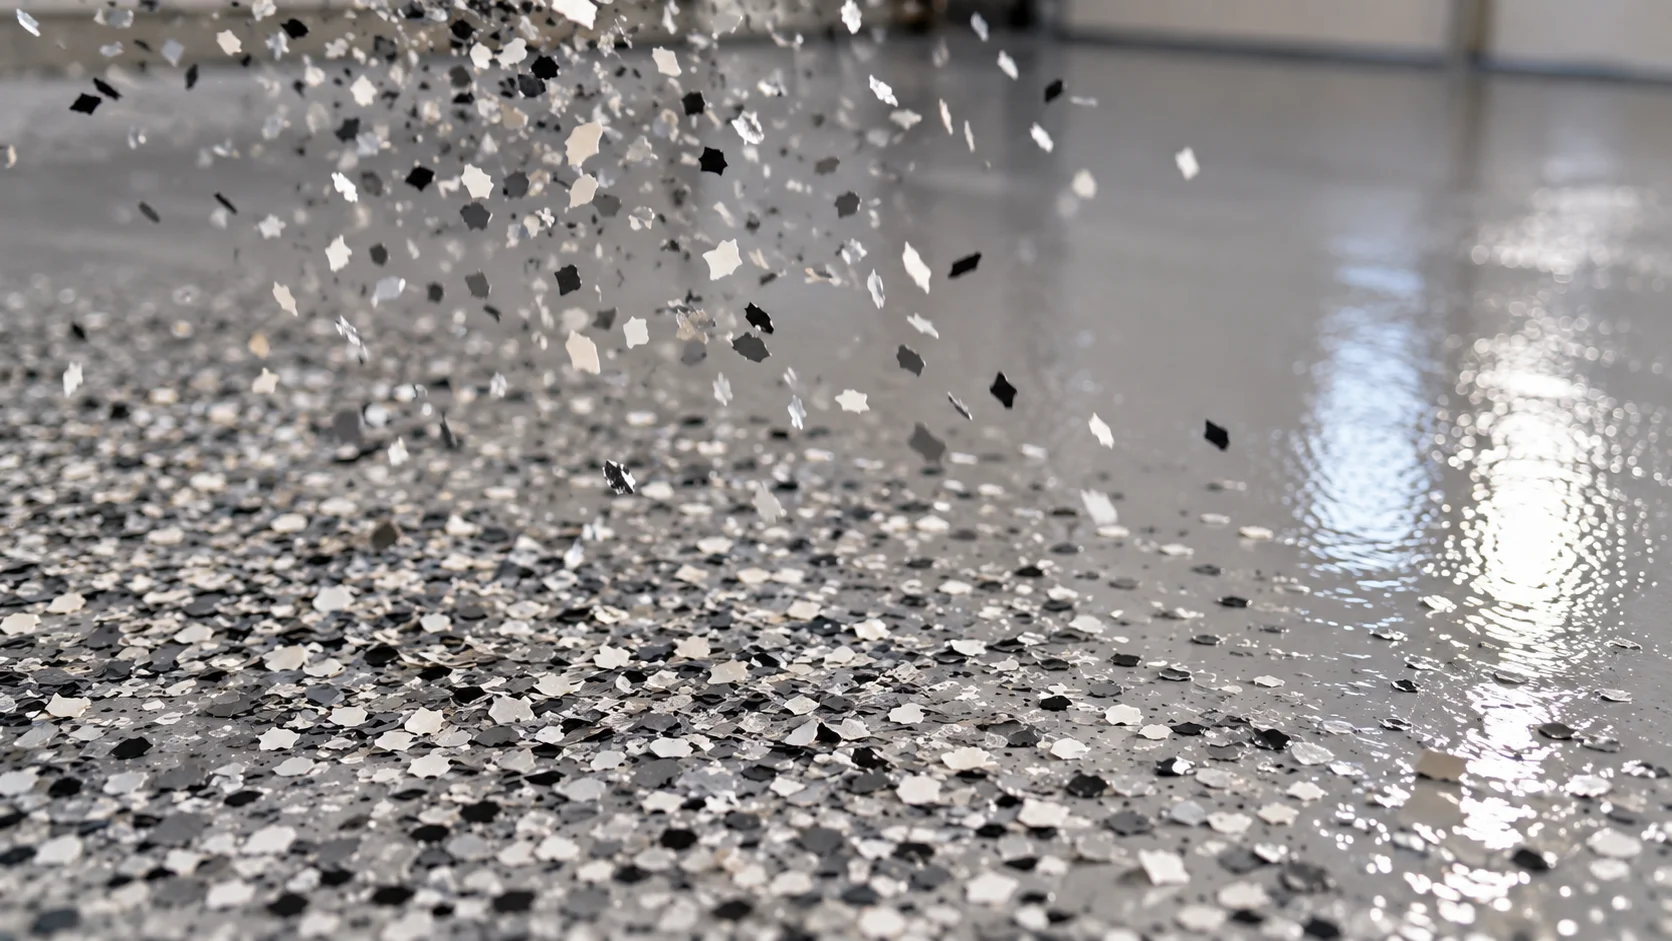
Flake — decorative vinyl chip — is the most requested finish we install, partly because it looks good and partly because it hides dirt and tire marks better than any solid color. The process is more interesting than most people expect. Full and partial broadcast, metallic and quartz alternatives are compared in our epoxy floor types guide.
- Grind and repair. Full mechanical profile with dust extraction, cracks chased and filled, spalls patched, edges cut in with a hand grinder against the walls and around the door track.
- Vacuum, twice. Any dust left in the pores becomes a bond breaker. This step is boring and it is not optional.
- Prime or base coat. Rolled and back-rolled to a consistent film, with a moisture-mitigating primer first if the slab called for one.
- Broadcast to refusal. While the base coat is still wet, flake is hand-cast up and out so it falls flat rather than edge-on, and the crew keeps casting until the floor will not absorb another chip — that is what "to refusal" means. A partial broadcast leaves a mottled, cloudy look and is a common giveaway of a rushed job.
- Scrape and vacuum. Once cured, the excess flake standing proud of the surface is scraped down with a flat blade and vacuumed off. This is the step that makes the finished floor feel smooth instead of like sandpaper, and it is the one most often skipped.
- Clear topcoat. One or two coats of aliphatic polyaspartic or urethane, which is what encapsulates the flake, provides the actual wear surface, and supplies the UV stability. Slip-resistant aggregate — aluminum oxide or polymer grit — gets broadcast into the final coat if the floor will see water.
The topcoat is doing most of the work people credit to the epoxy. It is what tires abrade, what road salt sits on, and what sunlight hits.
Why New Jersey Is Hard on Garage Floors
Freeze-thaw
Our winters do not stay frozen, and that is the problem. According to the Office of the New Jersey State Climatologist at Rutgers, the state averages 163 freeze-free days in the northern highlands, 179 across the central and southern interior, and 217 along the seacoast — meaning the rest of the calendar is spent crossing back and forth over 32°F. Water that has soaked into a porous or already-scaling slab expands roughly nine percent each time it freezes, prying the surface apart a little more with every cycle. An unsealed slab loses material to this. A properly coated one does not, because the water never gets in.
Road salt
Deicing chlorides are the other half of the equation, and a car is a very efficient delivery system for them. Salt is hygroscopic — it pulls moisture out of the air and holds it in the pore structure of the concrete — so a slab that has been dosed with brine off the Parkway stays wetter and freezes harder than one that has not. Chloride ions also attack the passive layer protecting embedded rebar, which is how salt exposure turns into structural damage over a couple of decades rather than a cosmetic one. A coated floor keeps chlorides on the surface where a mop handles them.
The garage door threshold fails first
When a garage floor peels, the peeling usually starts within a couple of feet of the overhead door. That strip takes everything at once: it is where snowmelt and driveway runoff reach the slab, where sun comes in at a low winter angle, where tires stop and pivot, and where grit and salt collect. It is also, structurally, the exposed edge of the coating film — and a coating edge with nothing holding it down is a place for water to get underneath.
The fix is a mechanical termination. Rather than feathering the coating out to the slab edge and hoping, we saw-cut a shallow anchor groove an inch or two back from the lip, fill it, and terminate the coating into it. The film is then locked into the slab rather than sitting on top of it, and water working at the edge has nothing to lift. Combined with a UV-stable topcoat on the sun-exposed strip, that one detail is the difference between a floor that starts curling at year three and one that does not.
Hot tire pickup
Driving generates heat in tires, and that heat pushes plasticizers — the compounds that keep rubber flexible — to the tire surface. Park a hot tire on a coating with a low glass transition temperature and two things happen: the film softens, and the plasticizers soften it further. As the tire cools it bonds to the coating, and the next time the car backs out the tire lifts the film off the slab like tape. Thin water-based kits are the classic victims. A properly cross-linked 100%-solids epoxy or a polyaspartic topcoat has a high enough heat deflection point that this does not occur — but no coating survives it if the bond to the slab was weak to begin with, which brings us back to prep.
UV and Ambering: The Honest Version
Epoxy yellows. Any installer who tells you otherwise is either uninformed or selling. The chemistry is documented: a peer-reviewed study in Polymers identified carbonyl formation in the epoxy backbone from thermo-oxidation as the cause of yellowing, and noted that the discoloration is irreversible — drying and reconditioning the material does not bring the color back. UV exposure accelerates the same process by breaking down aromatic structures in the polymer and in amine hardeners, generating the chromophores that read as amber.
This matters in a garage with a window or a door that spends summer afternoons open. A white or light grey epoxy left uncoated will drift warm and blotchy where the light lands and stay its original color where it does not — which looks worse than uniform yellowing. Aliphatic polyaspartic and aliphatic urethane topcoats are light-stable by design and do not do this. That is the single strongest argument for the topcoat, and it is why we specify one on every sun-exposed floor even when the budget is tight elsewhere.
The Temperature Window — Why This Is Seasonal Work Here
Conventional epoxy floor systems have a narrow application window. Sika's data sheet for Sikafloor-264, a typical pigmented epoxy floor resin, is representative: ambient and substrate between 50°F and 85°F, the substrate at least 5°F above the dew point, and relative humidity no higher than 85 percent during application and curing. An unheated Marlboro garage in February does not meet that spec, and a slab that reads 45°F will leave epoxy undercured, soft, and prone to amine blush — a greasy haze on the surface that ruins adhesion for the next coat.
Three practical consequences:
- Slab temperature lags air temperature by days. A warm afternoon in March does not mean a warm slab. We shoot the concrete with an infrared thermometer, not the air.
- Dew point is the trap in spring and fall. A cold slab on a humid day condenses moisture you cannot see, and coating over it guarantees a bond failure. Surface temperature has to stay above the dew point through the full cure, not just during application.
- Some polyaspartics extend the season, but read the data sheet. Cold tolerance varies by product. ArmorGarage's Polyaspartic 80 data sheet lists application at 30°F to 90°F but a 42°F minimum substrate temperature and warns that extreme cold slows the cure, while Westcoat's EC-102 polyaspartic is not to be applied below 50°F at all. For an unheated garage in December or January, the honest options are a cold-rated product on a slab that actually meets its minimum, temporary heat through the full cure, or waiting for spring.
For heated spaces — basements, warehouses, conditioned shops — the season is irrelevant and we install year round. Our commercial clients often schedule floor work in winter precisely because their buildings are heated and their shutdowns are easier to arrange then. Restaurant kitchens, warehouses and service bays need different systems from a home garage; our guide to commercial epoxy flooring in NJ covers them.
How Long Each System Actually Lasts
Lifespan claims in this industry are inflated across the board, so treat these as planning ranges for a properly prepared slab, not warranties. Manufacturers also expect maintenance: Westcoat's flake system specification calls for inspection every 2 to 4 years and a fresh topcoat every 3 to 5 years, depending on traffic and UV exposure.
- Big-box kit: one to three years in a garage that parks a car. Often less. The common failure mode is hot tire pickup starting in year one and edge peeling at the door in year two.
- Professional 100%-solids epoxy with a clear topcoat: 10 to 20 years on a properly prepped slab. In a basement with no UV exposure and no vehicles, the long end of that is realistic.
- Polyaspartic system: 10 to 15 years of hard garage service before the topcoat is worn enough to justify a refresh. A recoat at that point is a one-day scuff-and-topcoat, not a teardown.
- Polyurea base with polyaspartic topcoat: 15 to 20 years, and the crack-bridging base is the reason it holds up on older slabs that keep moving.
The variable that overwhelms all of these is preparation. The same product on the same slab can last two years or fifteen depending on whether the concrete was profiled and whether it was dry. That is the whole argument for hiring the work out.
Maintenance, Briefly
A coated floor is low-maintenance, not no-maintenance. Rinse the salt off in late winter rather than letting brine sit and evaporate on the surface all spring. Sweep grit — it is abrasive and it is what dulls a gloss floor. Use pH-neutral cleaner; degreasers and acidic bathroom products will haze a topcoat over time. Put pads under jack stands and floor jacks, because point loads from steel will dent any coating. And if you use tire shine or dressing, keep it off the floor — some formulations contain solvents that soften coatings.
Hiring Someone in New Jersey
Home improvement contractors working on residential property in New Jersey are required to register with the New Jersey Division of Consumer Affairs Home Improvement Contractor program, which explicitly covers painting and renovation work on residential and non-commercial properties. Ask for the registration number, and ask for a current certificate of insurance naming you.
Then ask these four questions, which separate real installers from people who bought a grinder last year:
- What CSP profile does your system specify, and how do you verify you hit it?
- Do you moisture test, and which standard — F1869, F2170, or both?
- How do you terminate the coating at the garage door?
- Is the topcoat aliphatic, and what is the total dry film thickness of the system?
You can see finished floors we have installed in our project gallery, and the same prep-first philosophy shows up in everything else we do — including exterior painting, where the failure modes are different but the underlying rule is identical: coatings fail at the substrate, not in the can.
Frequently Asked Questions
How much does an epoxy garage floor cost in New Jersey?
Published 2026 data puts professional epoxy at $3 to $12 per square foot and polyaspartic at $4 to $9, so a 400 sq ft two-car garage works out to roughly $1,200 to $4,800 for epoxy or $1,600 to $3,600 for polyaspartic. New Jersey labor runs about 20 percent above the national median, so expect quotes in the middle and upper part of those ranges. Slab repair, removal of a failed previous coating, and moisture mitigation are the three factors most likely to push a quote higher.
Is polyaspartic better than epoxy?
For a garage, usually yes — it cures in hours instead of days, it is UV-stable so it will not amber, and it is more abrasion resistant. Epoxy still wins on cost, on film build per coat, and on self-leveling over an imperfect slab, which makes it an excellent basement and workshop choice. The strongest systems use both: an epoxy or polyurea base with a polyaspartic topcoat.
Can you coat a garage floor in winter in New Jersey?
In a heated garage or basement, yes, year round. In an unheated garage, conventional epoxy generally needs the slab at 50°F or warmer and at least 5°F above the dew point through the full cure, which rules out most of December through March in Central Jersey. Some polyaspartics are rated for colder air, but even those list a minimum slab temperature (42°F on one common product), so cold-weather work depends on the specific data sheet or on temporary heat.
Why did my previous epoxy floor peel?
Almost always one of three causes: the slab was acid-etched or not profiled at all, so the coating never had mechanical bond; the slab was releasing moisture and the film blistered from underneath; or the coating was a thin water-based product that lost its grip to hot tire pickup. Peeling that starts at the overhead door and works inward points to an unanchored edge combined with water and salt at the threshold.
Do I need a moisture test for a basement floor?
Yes. Basement slabs in older Monmouth and Ocean County homes were frequently poured without a vapor retarder, and they can push enough moisture to blister a coating within weeks. ASTM F1869 measures the emission rate in pounds per 1,000 square feet per 24 hours; ASTM F2170 measures relative humidity inside the slab using in-situ probes. If the readings are high, a vapor-barrier primer goes down first. Skipping the test is how a basement floor ends up ground off and installed twice.
How long before I can park on a new epoxy floor?
For a conventional 100%-solids epoxy system, foot traffic in about 24 hours and vehicles after five to seven days — the coating needs full cure before hot tires load it. Polyaspartic systems are typically walkable in three to four hours and rated for vehicles in roughly 24. Parking early is one of the most common ways homeowners damage a floor that was installed correctly.
How long does an epoxy garage floor last?
On a properly ground, dry slab, a professional 100%-solids epoxy with a clear topcoat is a 10 to 20 year floor, and a polyaspartic system 10 to 15 years before it needs a refresh. Plan on maintenance along the way: one manufacturer's flake system specification calls for a new topcoat every 3 to 5 years depending on traffic and sun. A thin DIY kit in a garage that parks a car often lasts one to three years.
Can you put epoxy on a cracked garage floor?
Yes, if the cracks are repaired first and the slab is not still moving structurally. Cracks are chased open, filled with a rigid epoxy or polyurea filler and ground flush, and spalled areas at the door are patched. A flexible polyurea base bridges hairline cracks better than epoxy. Wide or displaced cracks point to a structural problem that needs a concrete contractor before any coating.
Talk to Us About Your Floor
NJ Painting Co. is a family-owned contractor based at 36 Church Rd in Morganville, licensed, fully insured, and 20-plus years into this work. We install epoxy, polyurea and polyaspartic floor systems for garages, basements, workshops and commercial spaces across Monmouth, Middlesex, Ocean, Mercer, Somerset and Burlington counties, plus Union, Essex, Hudson, Bergen and Passaic in North Jersey — including Morganville and Marlboro, with the full list on our service areas page and county pages for Monmouth, Middlesex and Ocean. Every estimate includes a slab assessment and, on basements, a moisture reading before we quote a system.
See the full scope of what we install on our epoxy flooring page, compare finishes in our epoxy floor types guide, or request a free estimate and we will come look at your slab. Call (732) 239-0932 if you would rather just talk it through.
About the author
Written by the NJ Painting Co. team
NJ Painting Co. is a family-owned painting contractor based in Monmouth County, in business since 2004. We are licensed and fully insured, work with Benjamin Moore and Sherwin-Williams paints, and back our work with a 2-year workmanship warranty. We serve Monmouth, Middlesex, Ocean, Mercer, Somerset and Burlington counties, plus Union, Essex, Hudson, Bergen and Passaic in North Jersey.